Low Battery!
A cautionary tale filled with magic, wonder and adhesive, wait what?...
I mentioned in my last post that I’d ordered a new battery for my aging Macbook Pro 2013 15" Retina.
Before I continue, I would just like to say that I do not recommend or advocate that you carry this particular piece of maintenance out, Apple are quite clear that the battery in these Macbook Pro models is not user serviceable. You should take your MacBook Pro to the nearest Apple Store and pay £199.99 for them to replace the battery for you with one of their OEM models.
That should cover me off from being sued.
If you decide to ignore the above, and replace your battery anyway, then proceed at your own risk, be careful and do not come running to me if you set yourself on fire. I strongly believe in the right to repair something that you buy and own, but you have to accept that you might well destroy what you’re attempting to fix if you either don’t take the proper precautions or the manufacturers really don’t want you to mess around inside there.
Make sure you do your research, set aside some time where you can be fully focussed on the task at hand and make sure you’re confident that you know what you’re doing. Backup your data. Be careful. Don’t die.
There are many manufacturers selling battery replacements. Some on Ebay, some on Amazon. I had a look at it before and decided that I would give it a go with a company named NinjaBatt. They seemed to have pretty good reviews and prices seemed to be around the £80 mark, which seemed about right. Apple charge £200 but that obviously includes them swapping out said battery, which can be a little tricky if you don’t have the right tools or watch the right videos.
There are many videos on Youtube. Some are downright scary and walk you through disconnecting and removing every single component from the laptop and then finally removing the battery using adhesive remover and an ifixit kit. This kit is pretty handy to be honest, its got cards, scrapers, allsorts of tools to get into things and the all important adhesive remover which dissolves adhesive on contact. Other videos talk you through leaving everything in, using thread to effectively friction burn the adhesive away.
All in all, it depends on what model/year your MacBook pro is. The video I watched the touchpad wire went over the back of the battery and had to be removed and then reconnected. I bought some nylon thread but it snapped, so decided to wait for the ifixit kit I’d ordered.
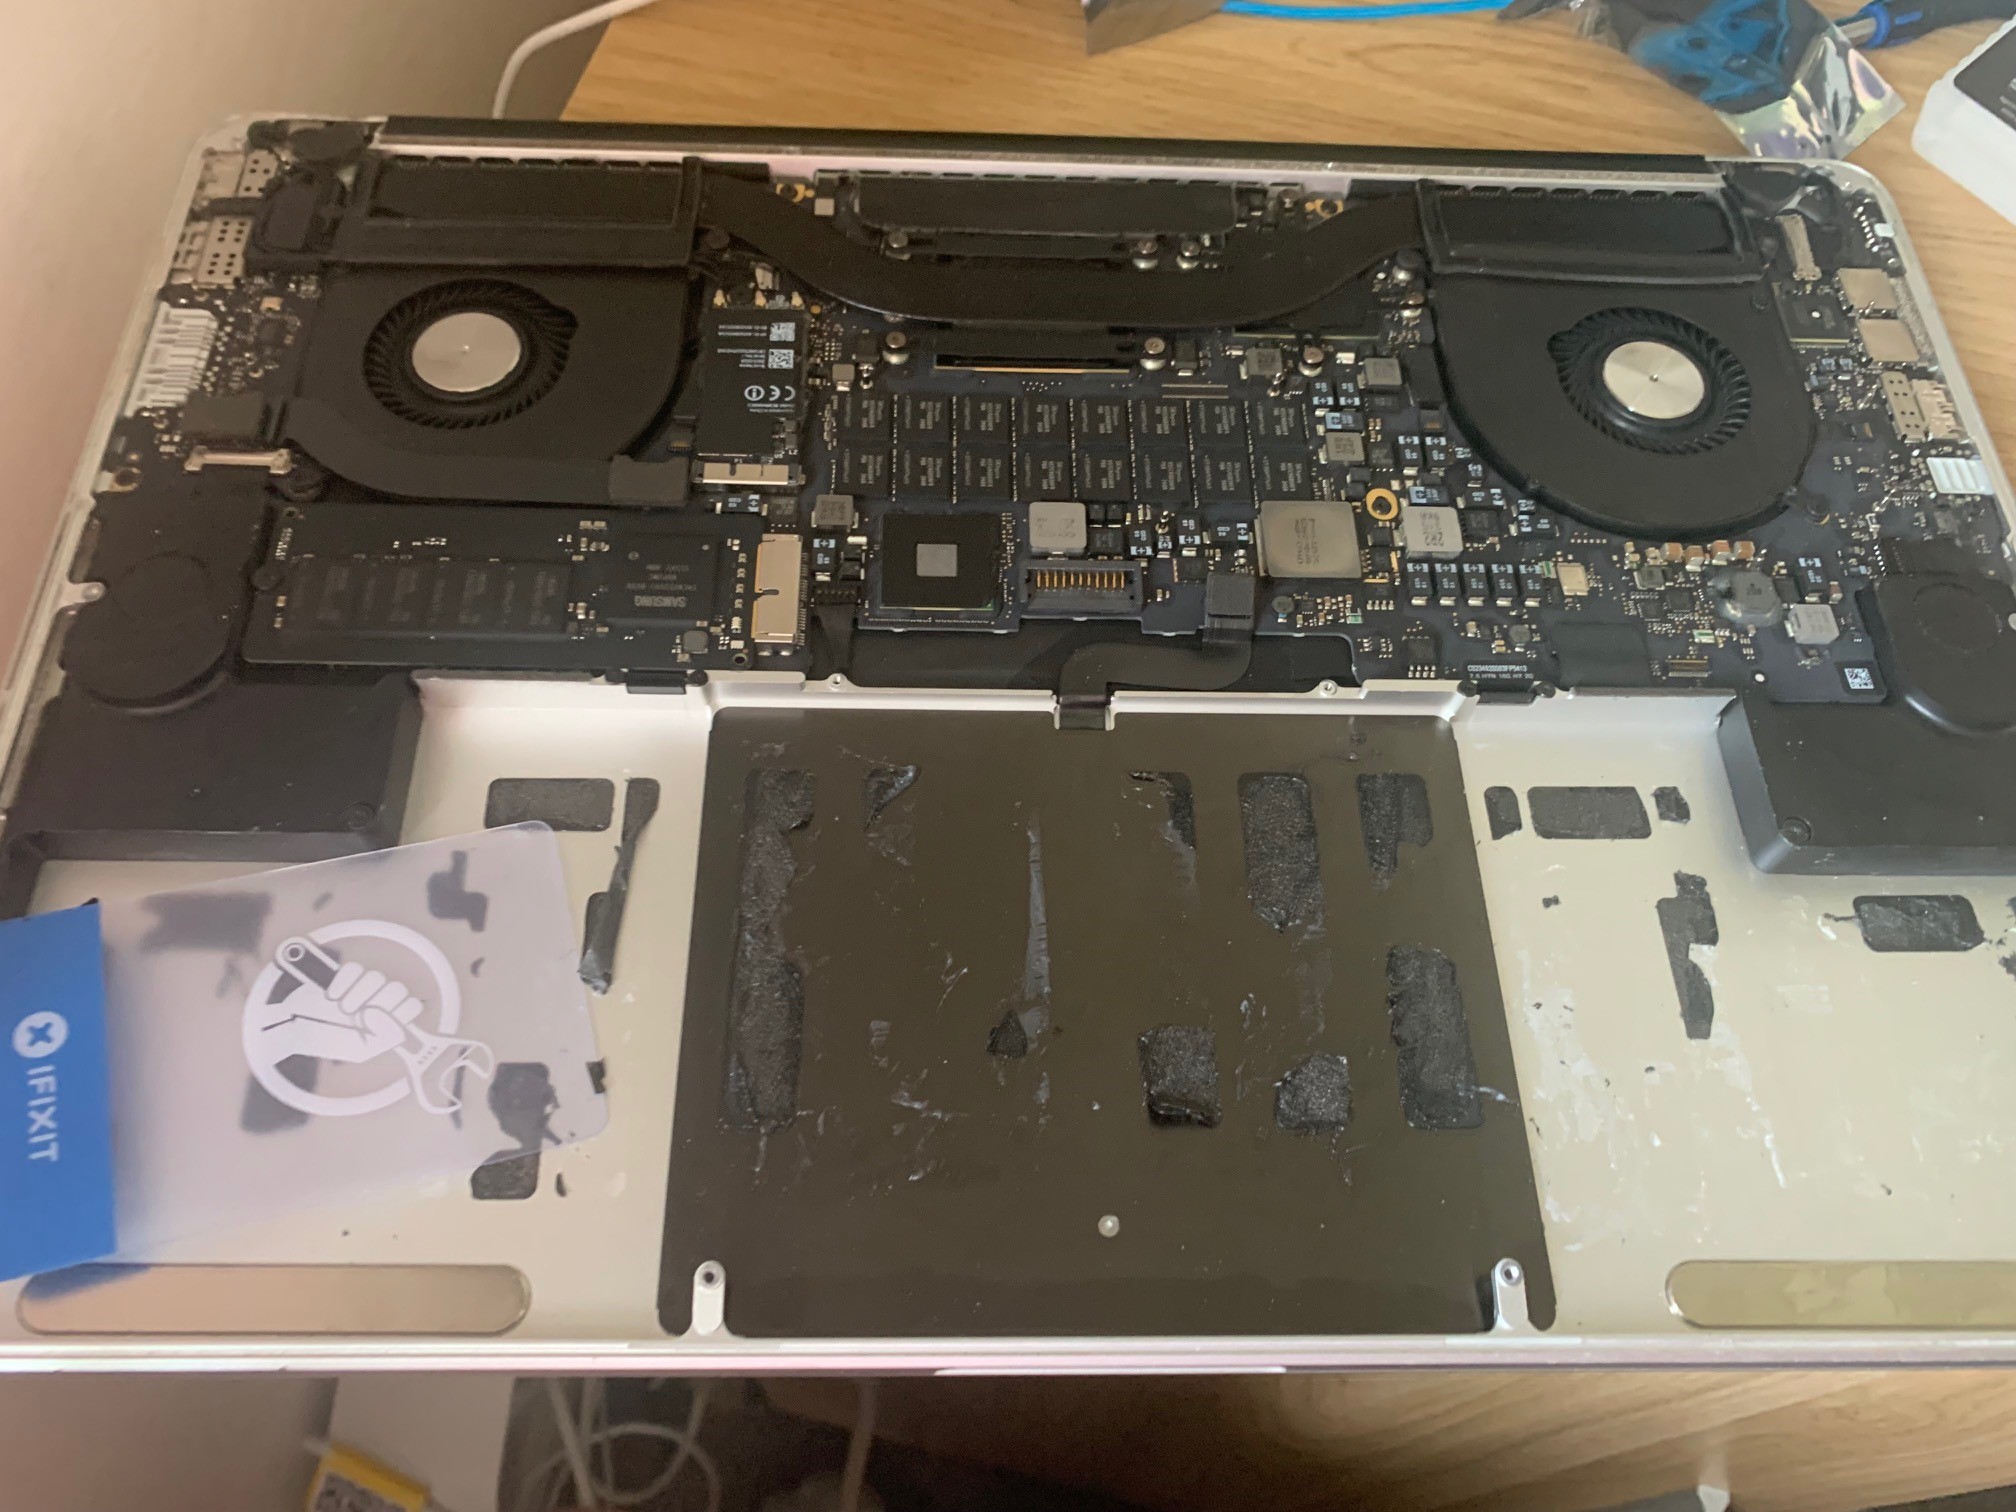
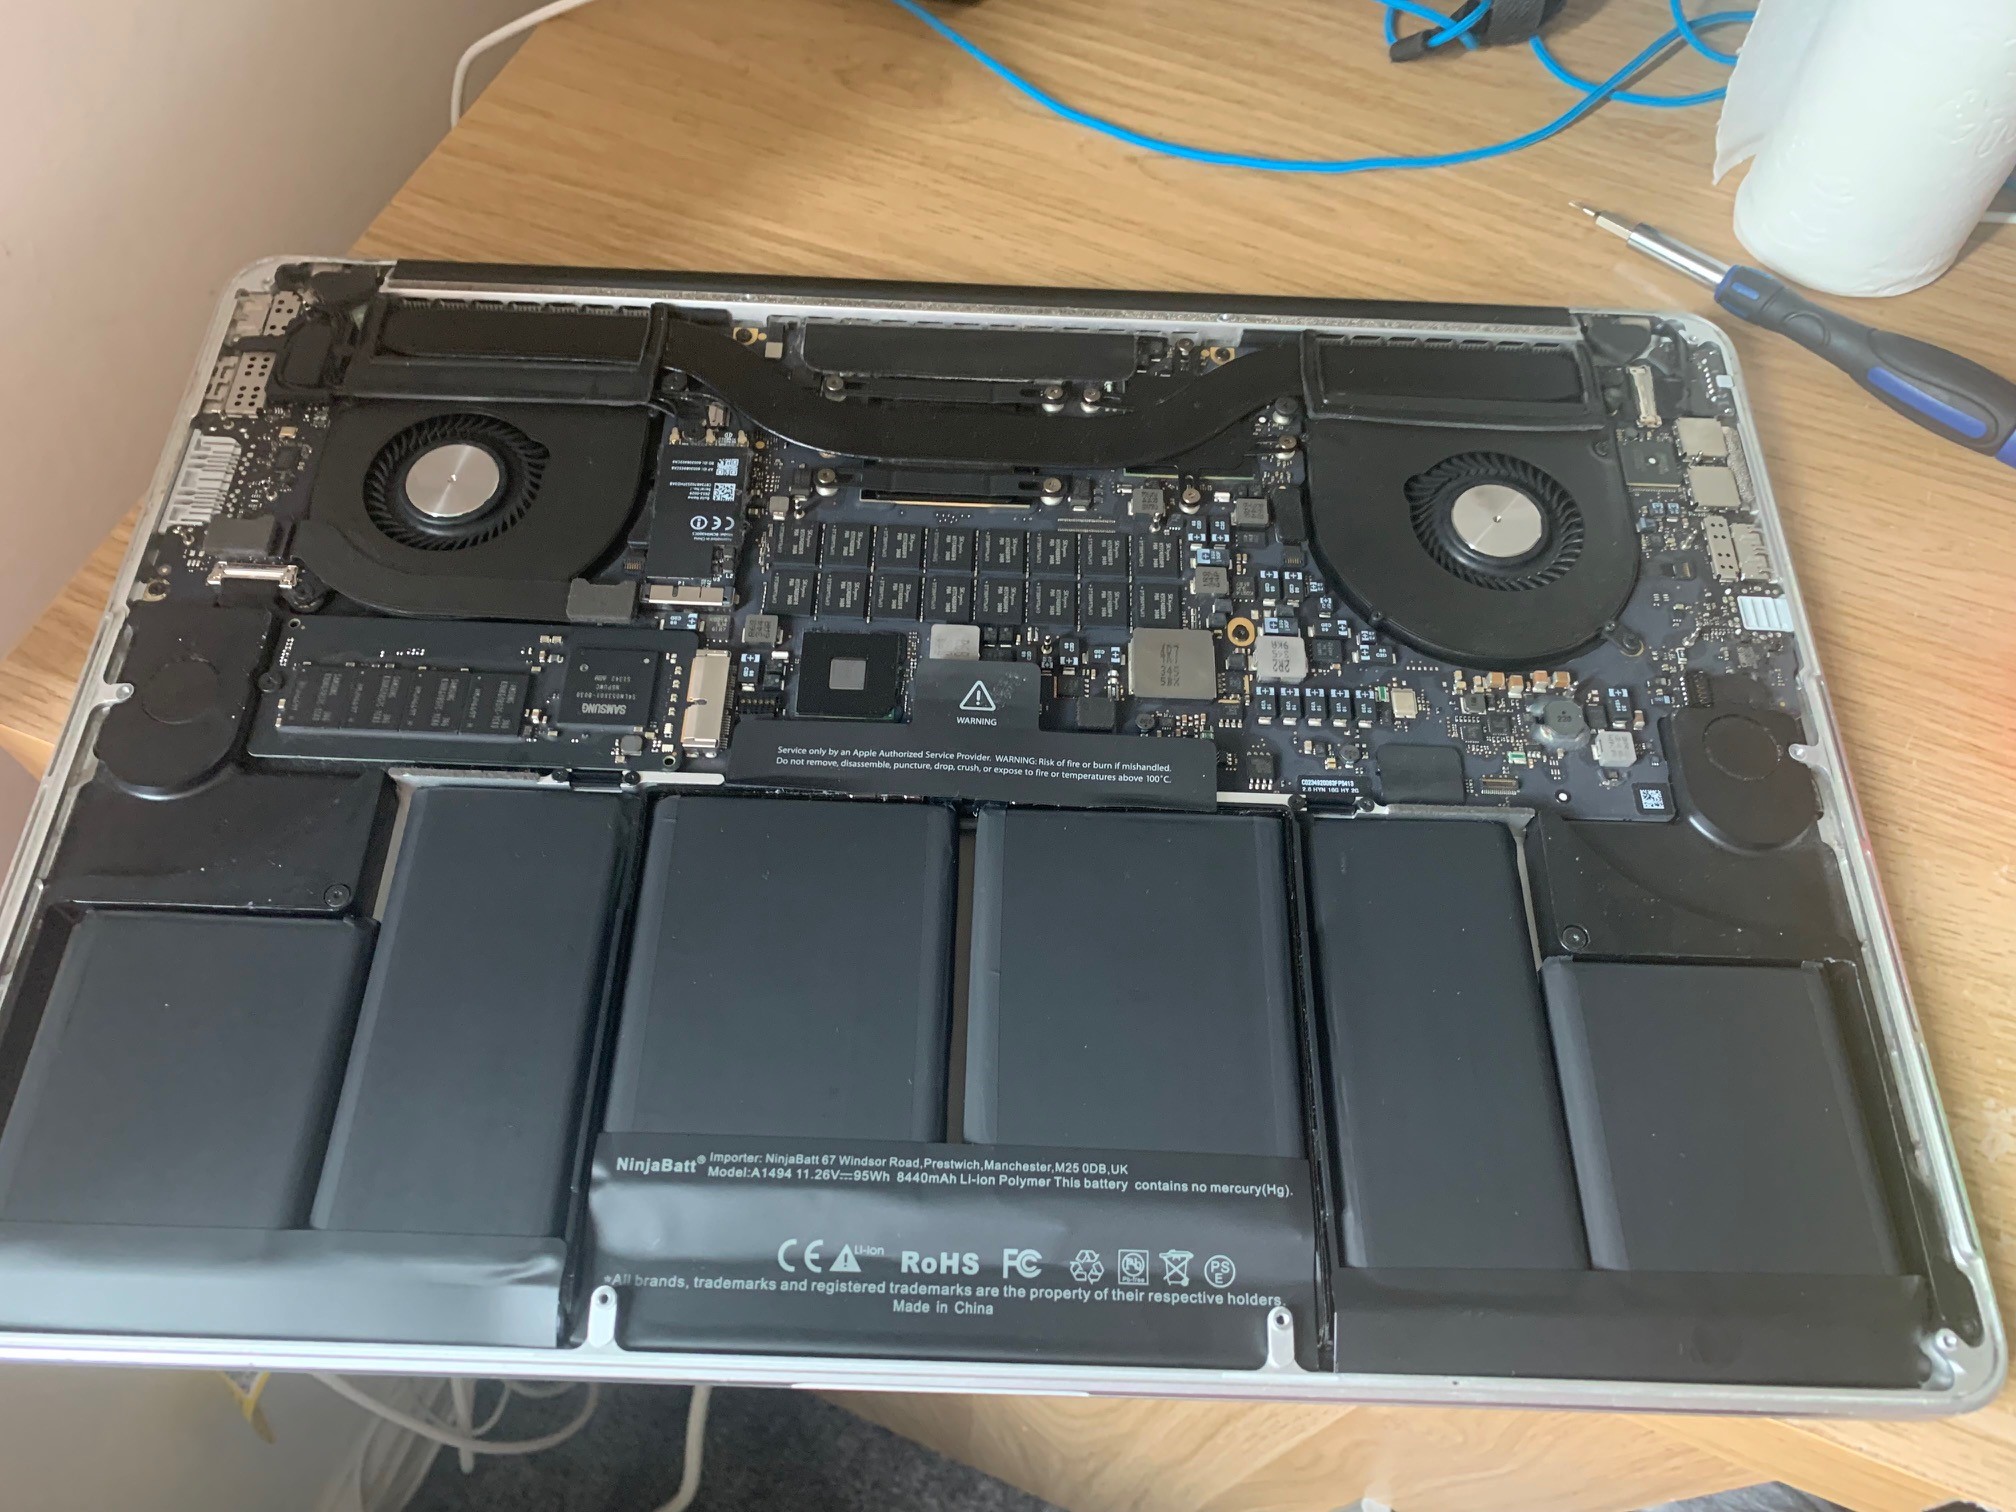
I started off by opening the back of the MacBook pro.
As there are no user serviceable parts inside, and the RAM is hard soldered/part of the logic board this is the first time I’ve had the back off. You can see the 1TB SSD drive to the left which was a huge deal in 2013 and if I remember rightly it cost an extra £850 :D
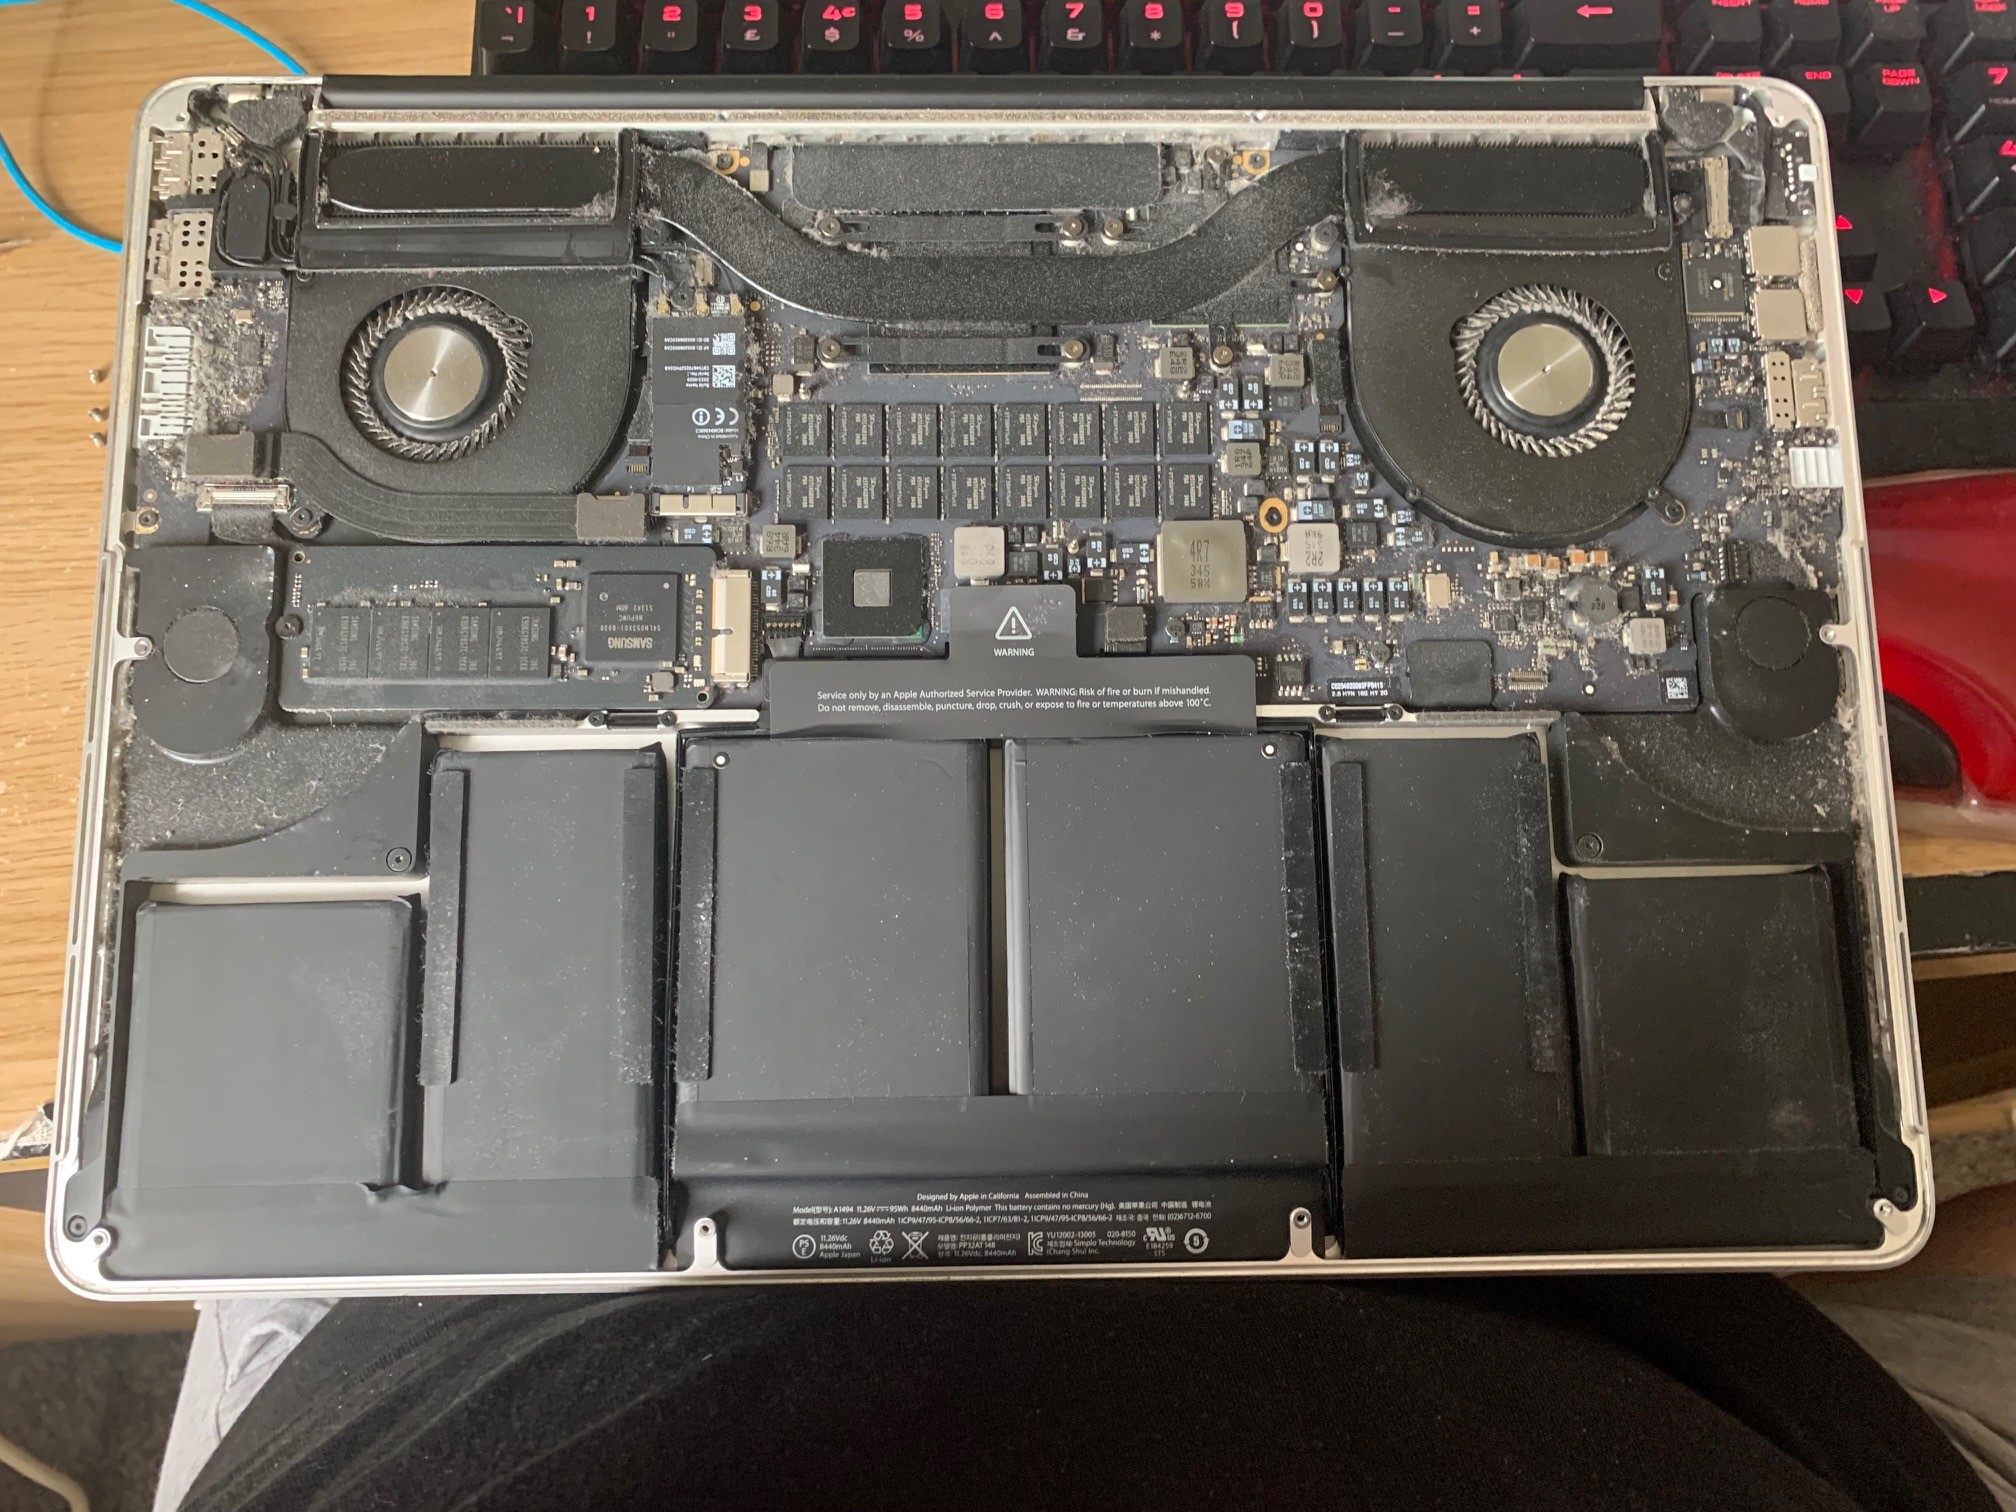
It is extremely dusty. Good job I bought some SprayDuster.
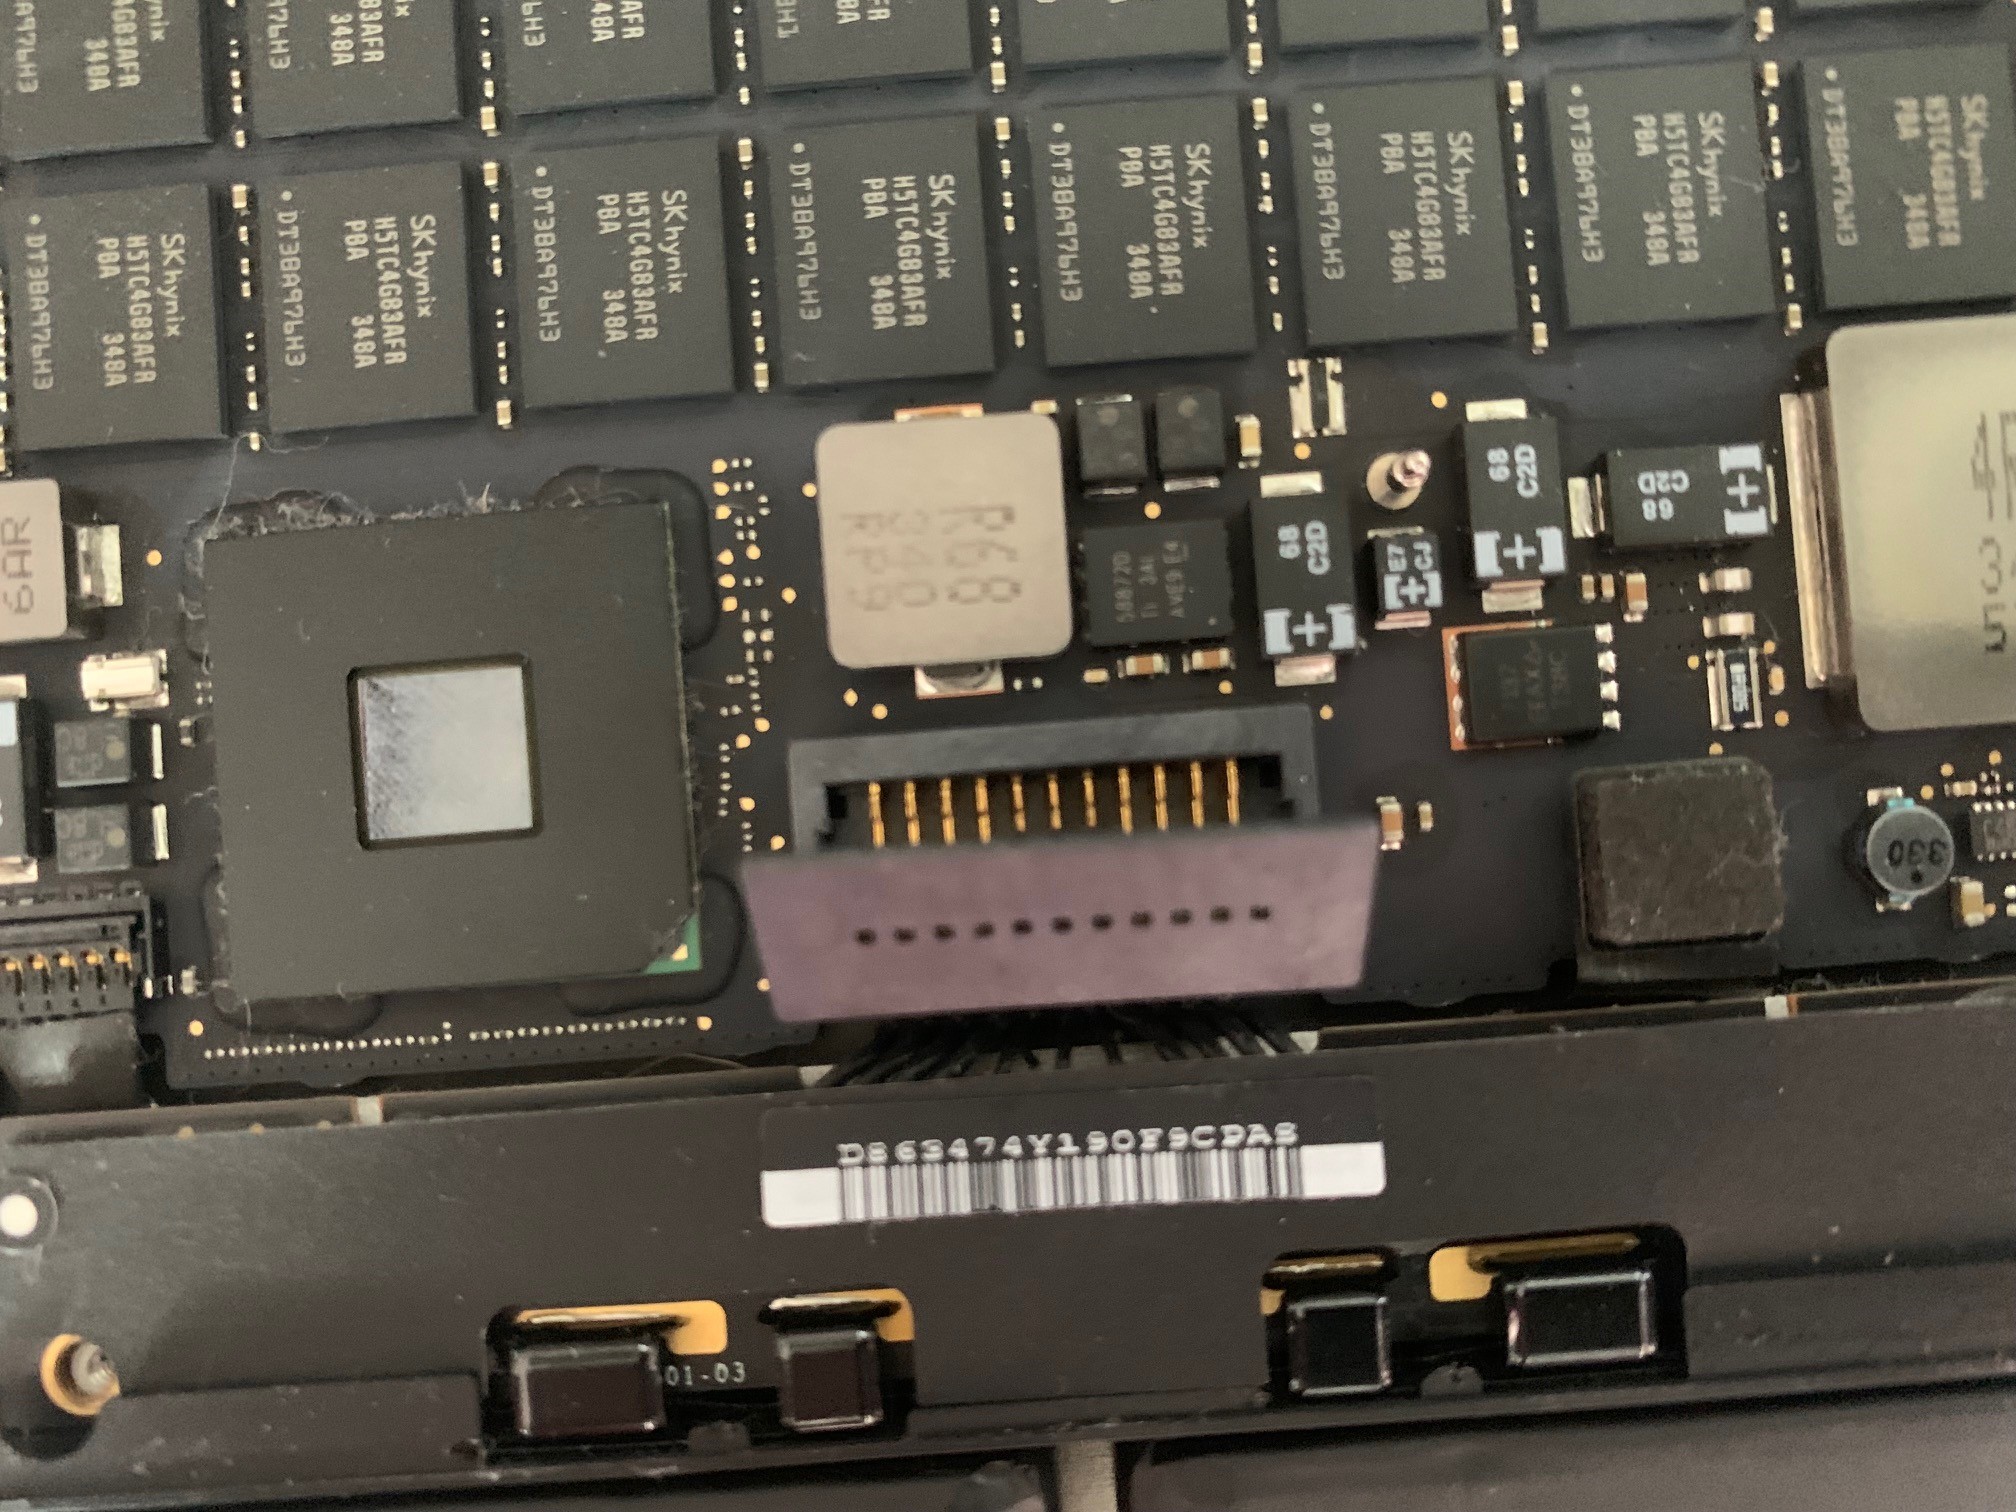
The battery is connected to a single port on the logic board, which can be easily detached.
I gave it a good spraying of compressed air and off I went to the next stage.

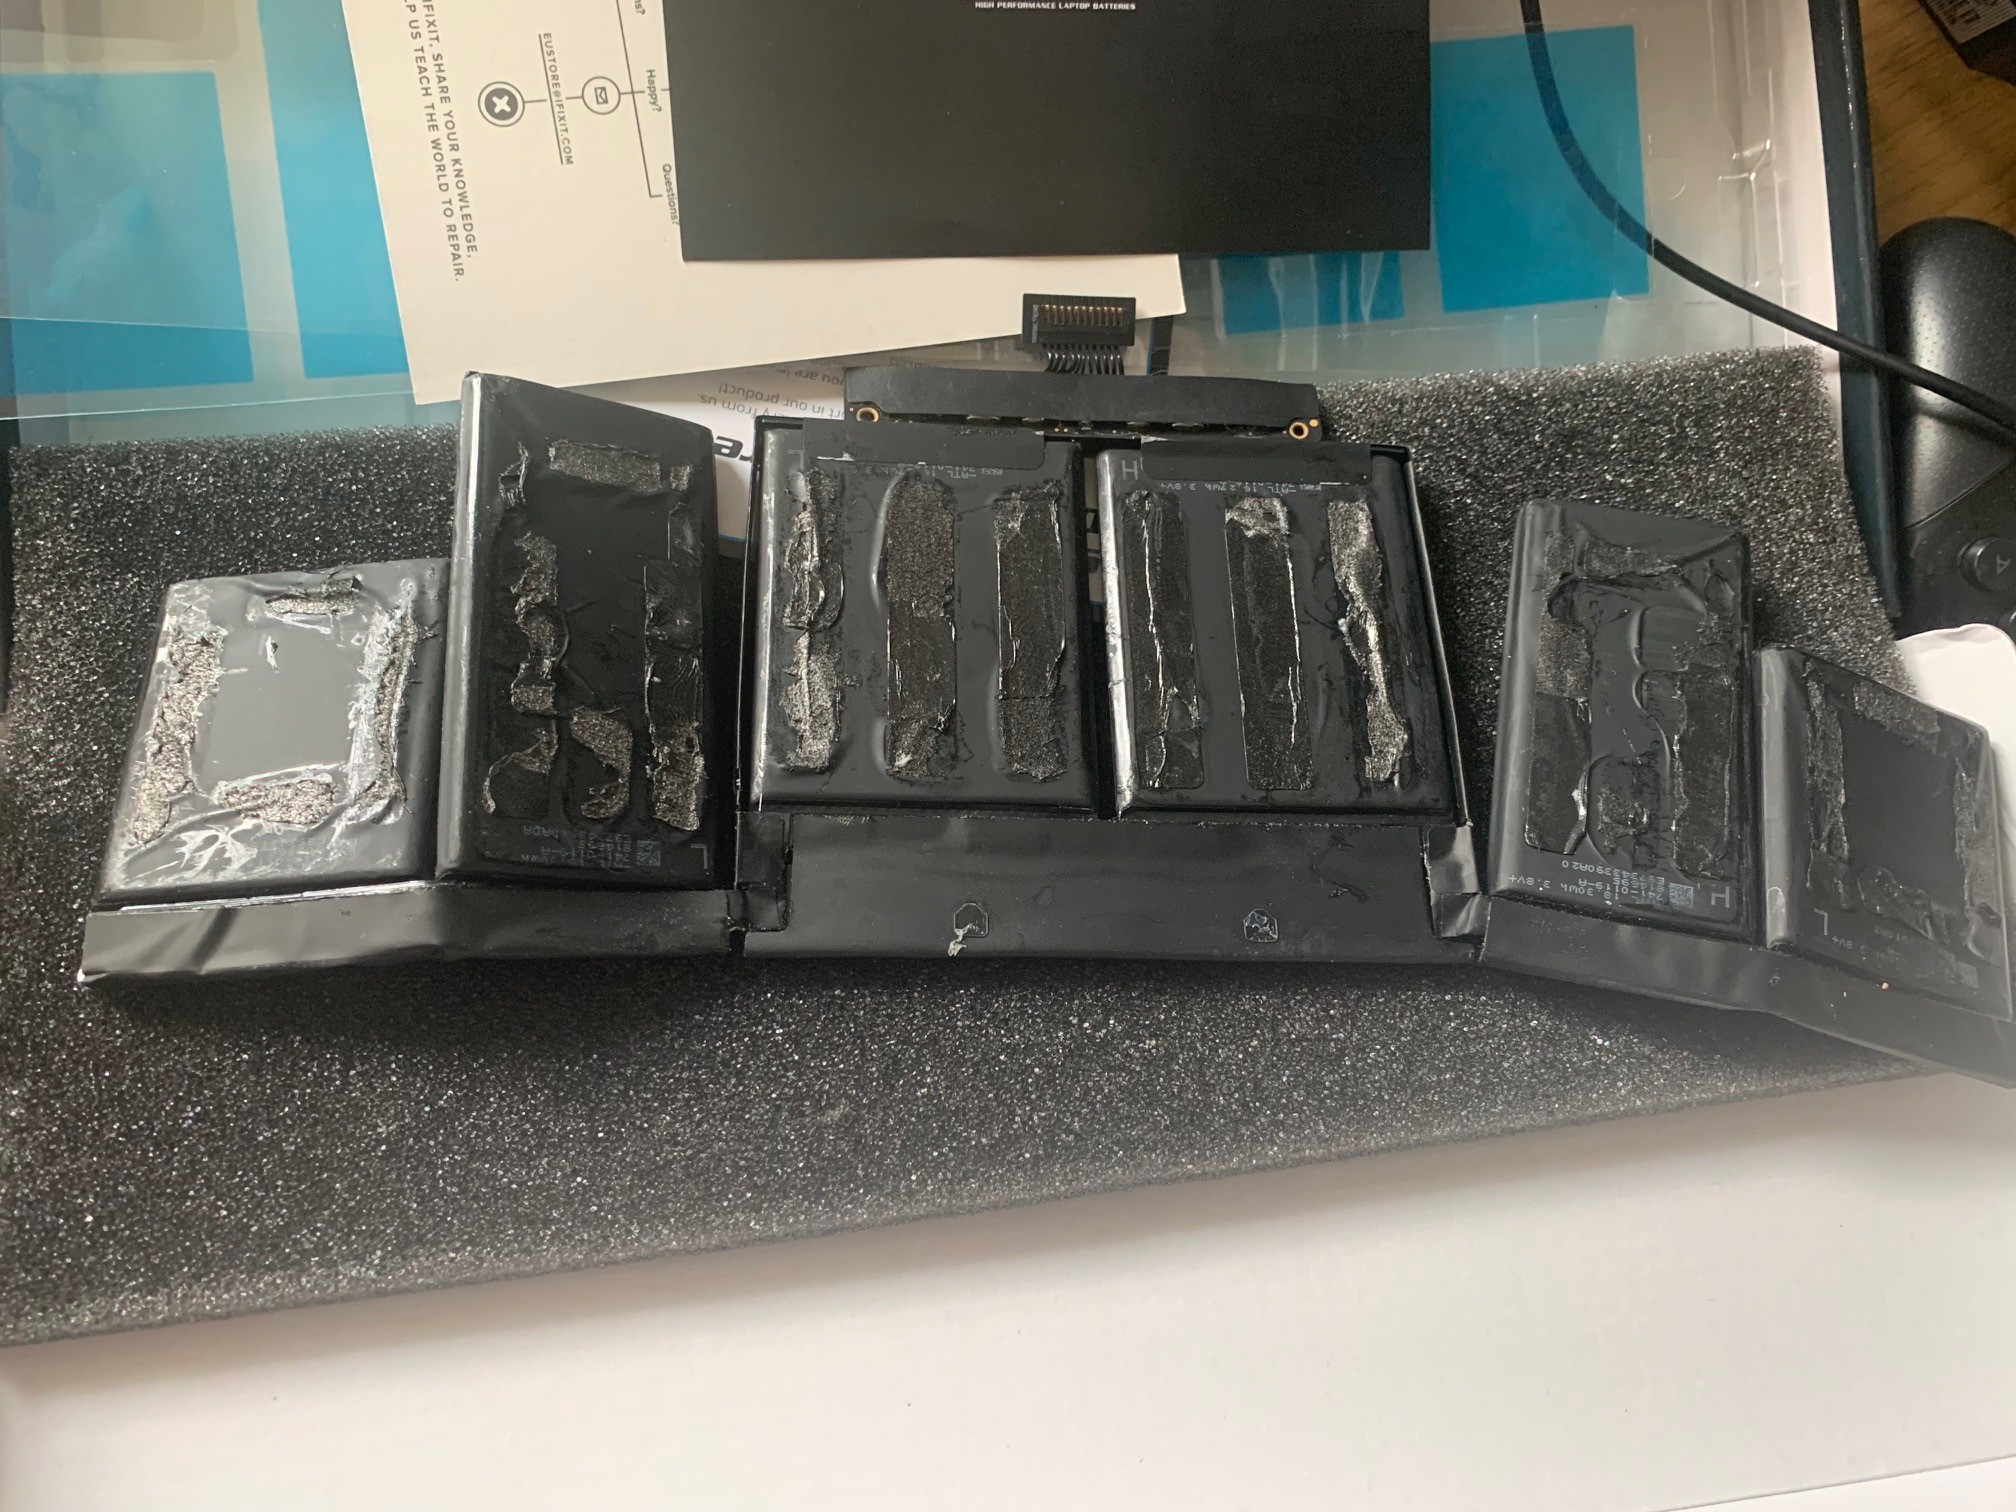
I didn’t get any photos of the adhesive remover going in but you get it in a little dripper bottle and you drip it around the edge of the battery cells and give it a moment to work through. Then you take one of the plastic ifixit cards and gently work your way under the cell, trying to lift it if you can.
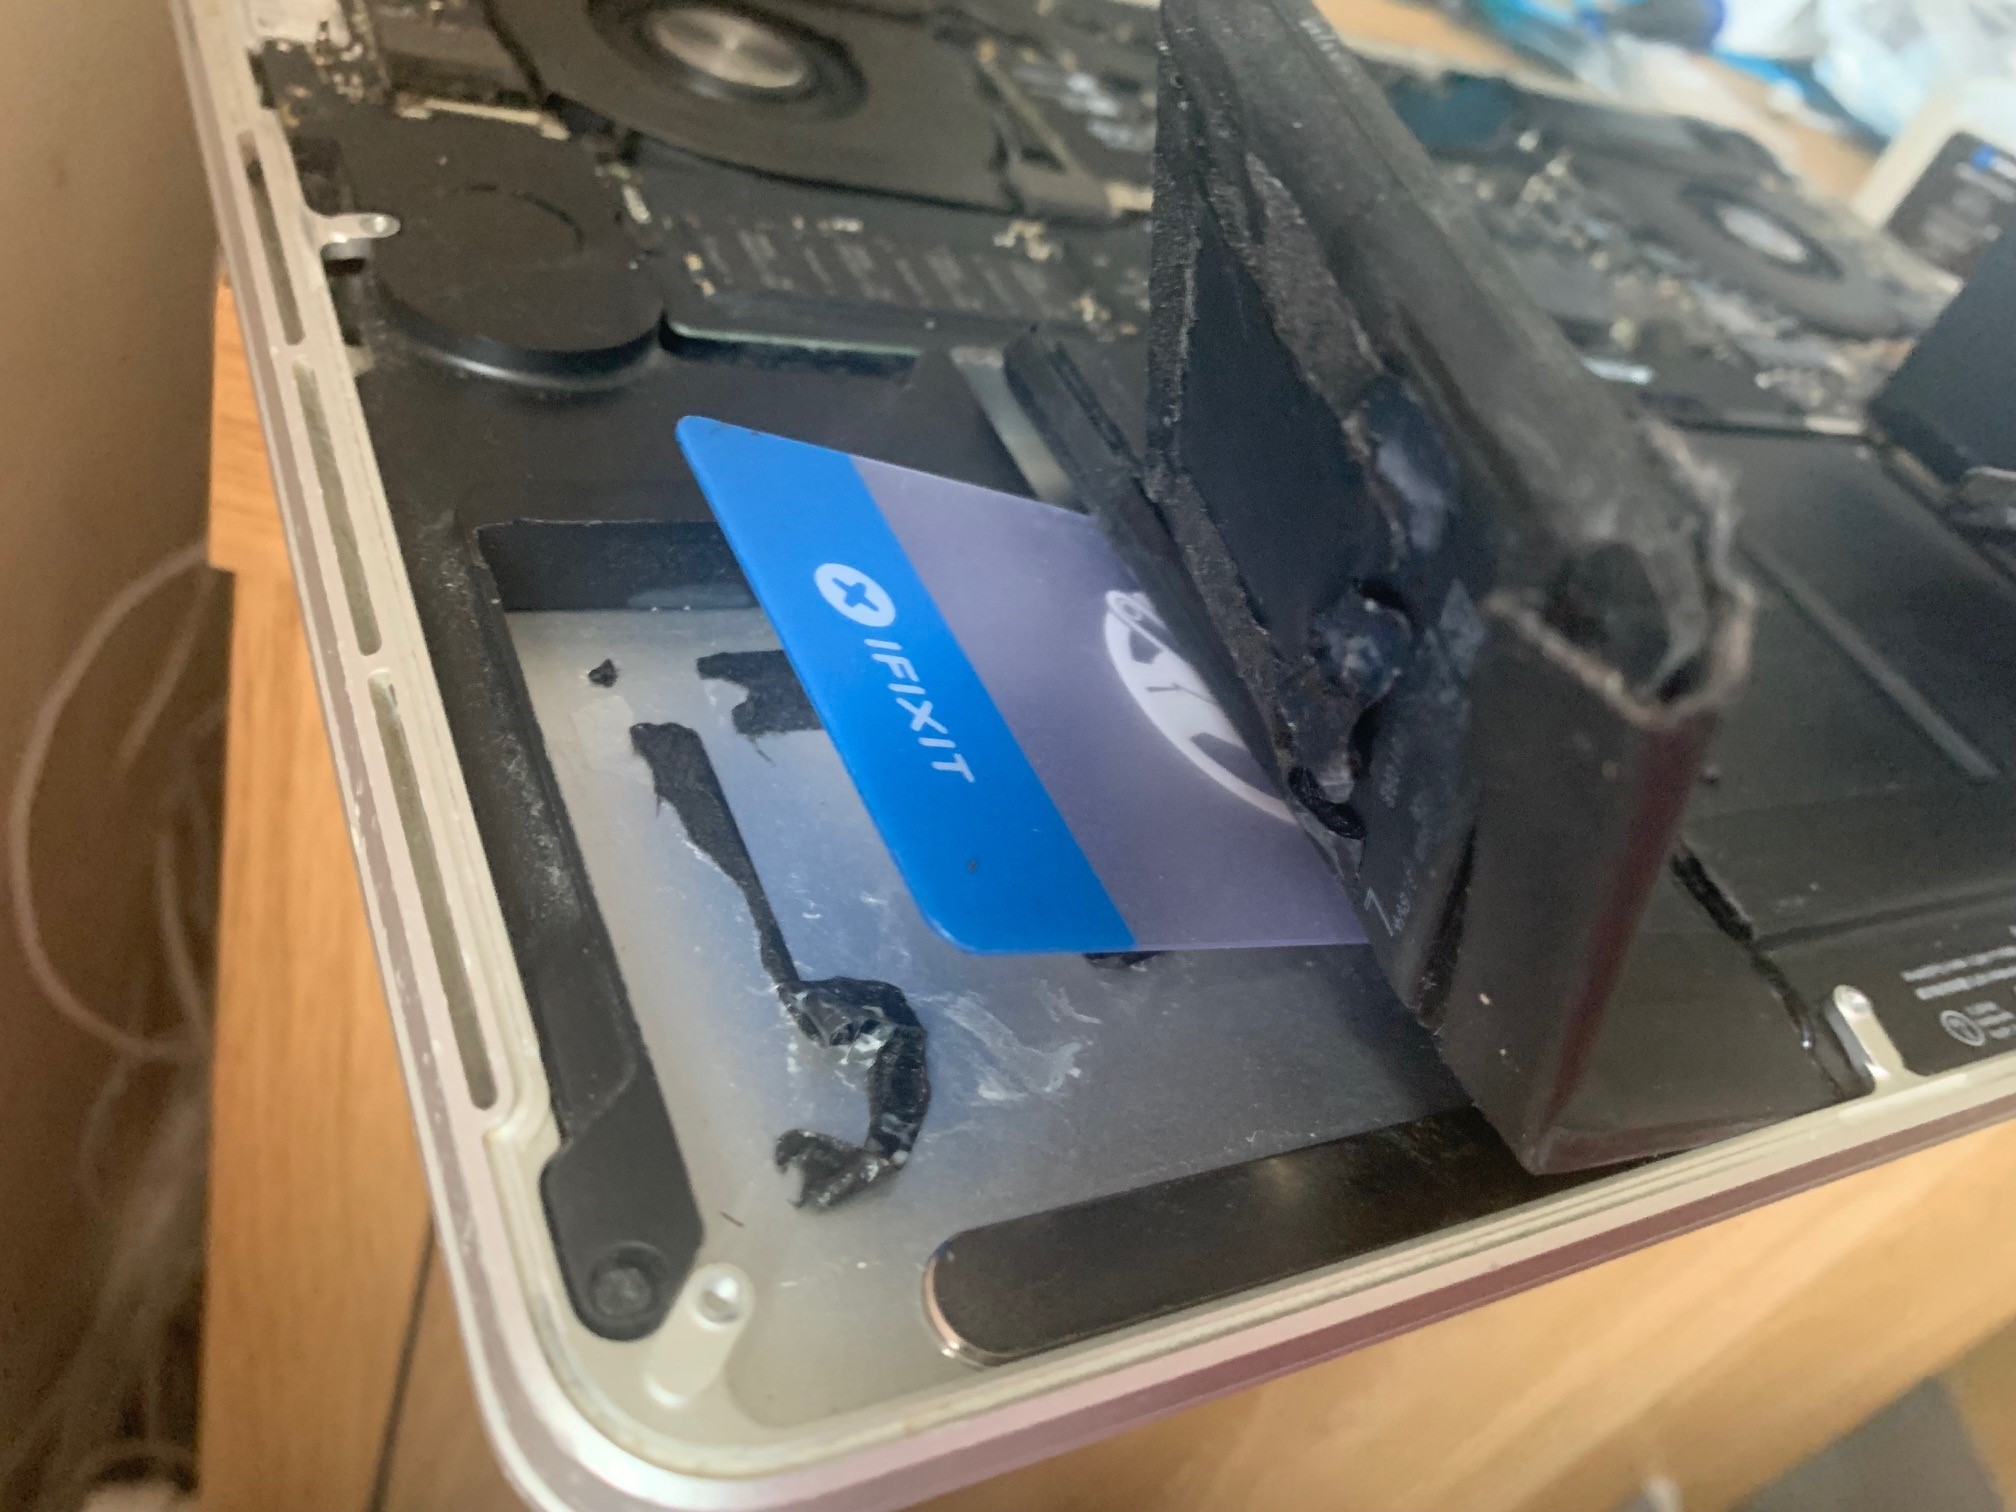
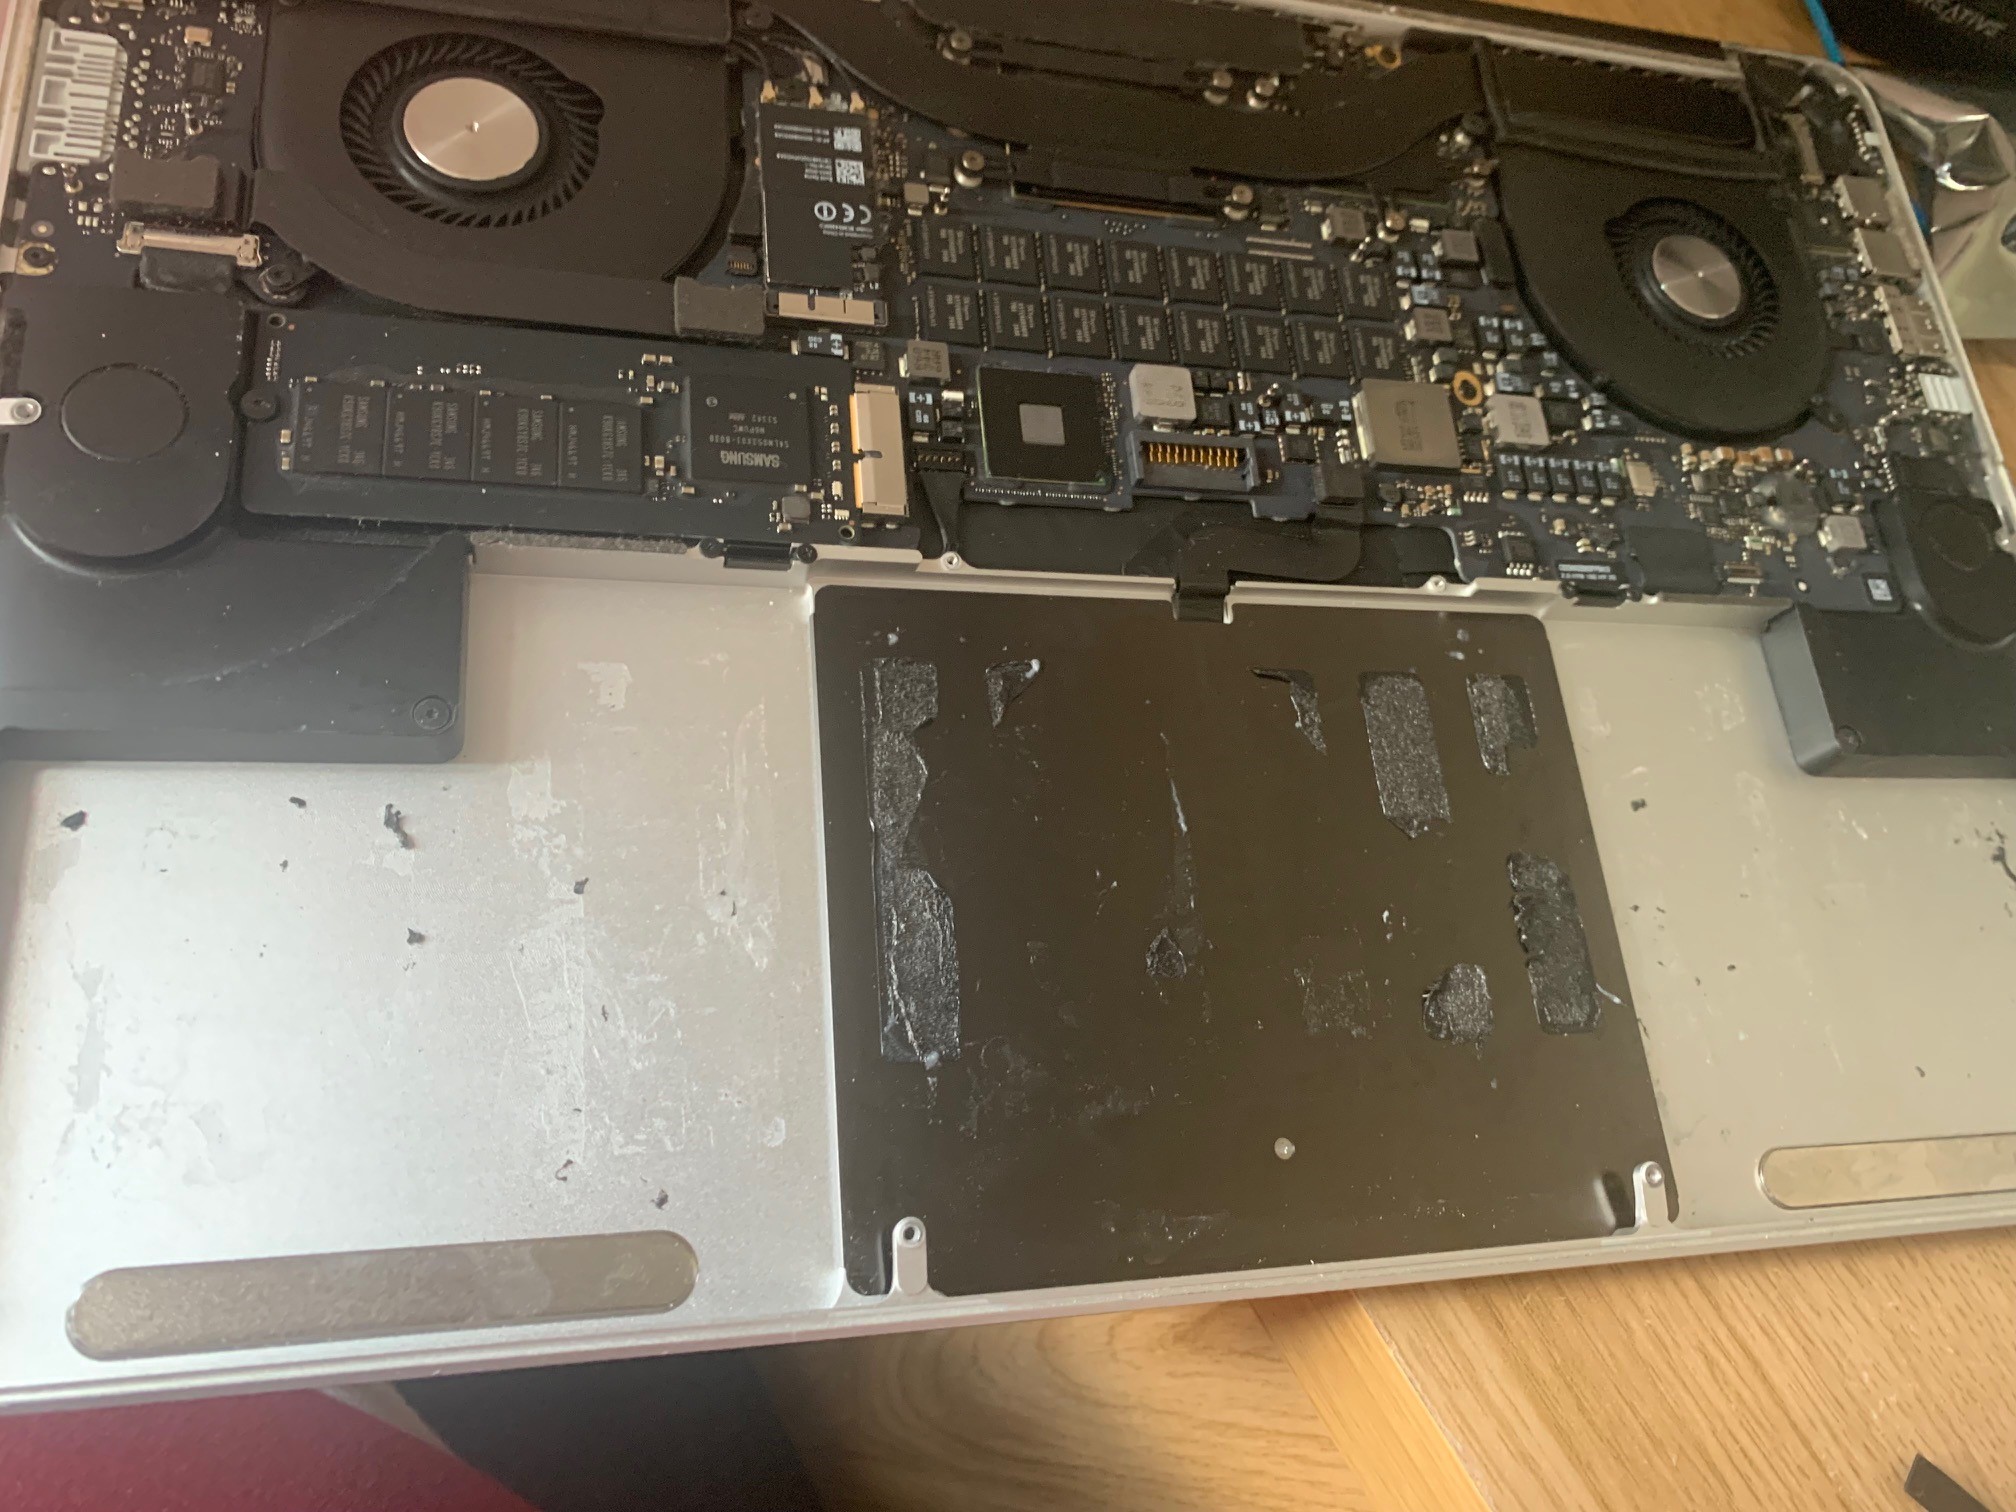
You work your way around those first two cells on the left, then move over to work your way through the two that are on the right, they leave around some residue and sticky pads but there’s nothing down here aside from the magnets that tell the laptop the shell is closed when they connect to the magnets/whatever detects the magnets on the screen.
Once you’ve gottem either side out, you then work on the middle cells, which are helpfully glued to the underside of the touchpad. Be careful, and go in from the middle of these two cells rather than the edges, see the gap below.
Once you have them out, it’ll crumple into a big mess, as these things are connected at the bottom only. Be very careful, these are lithium-ion batteries and if you damage them or mishandle them, they could explode or set on fire.

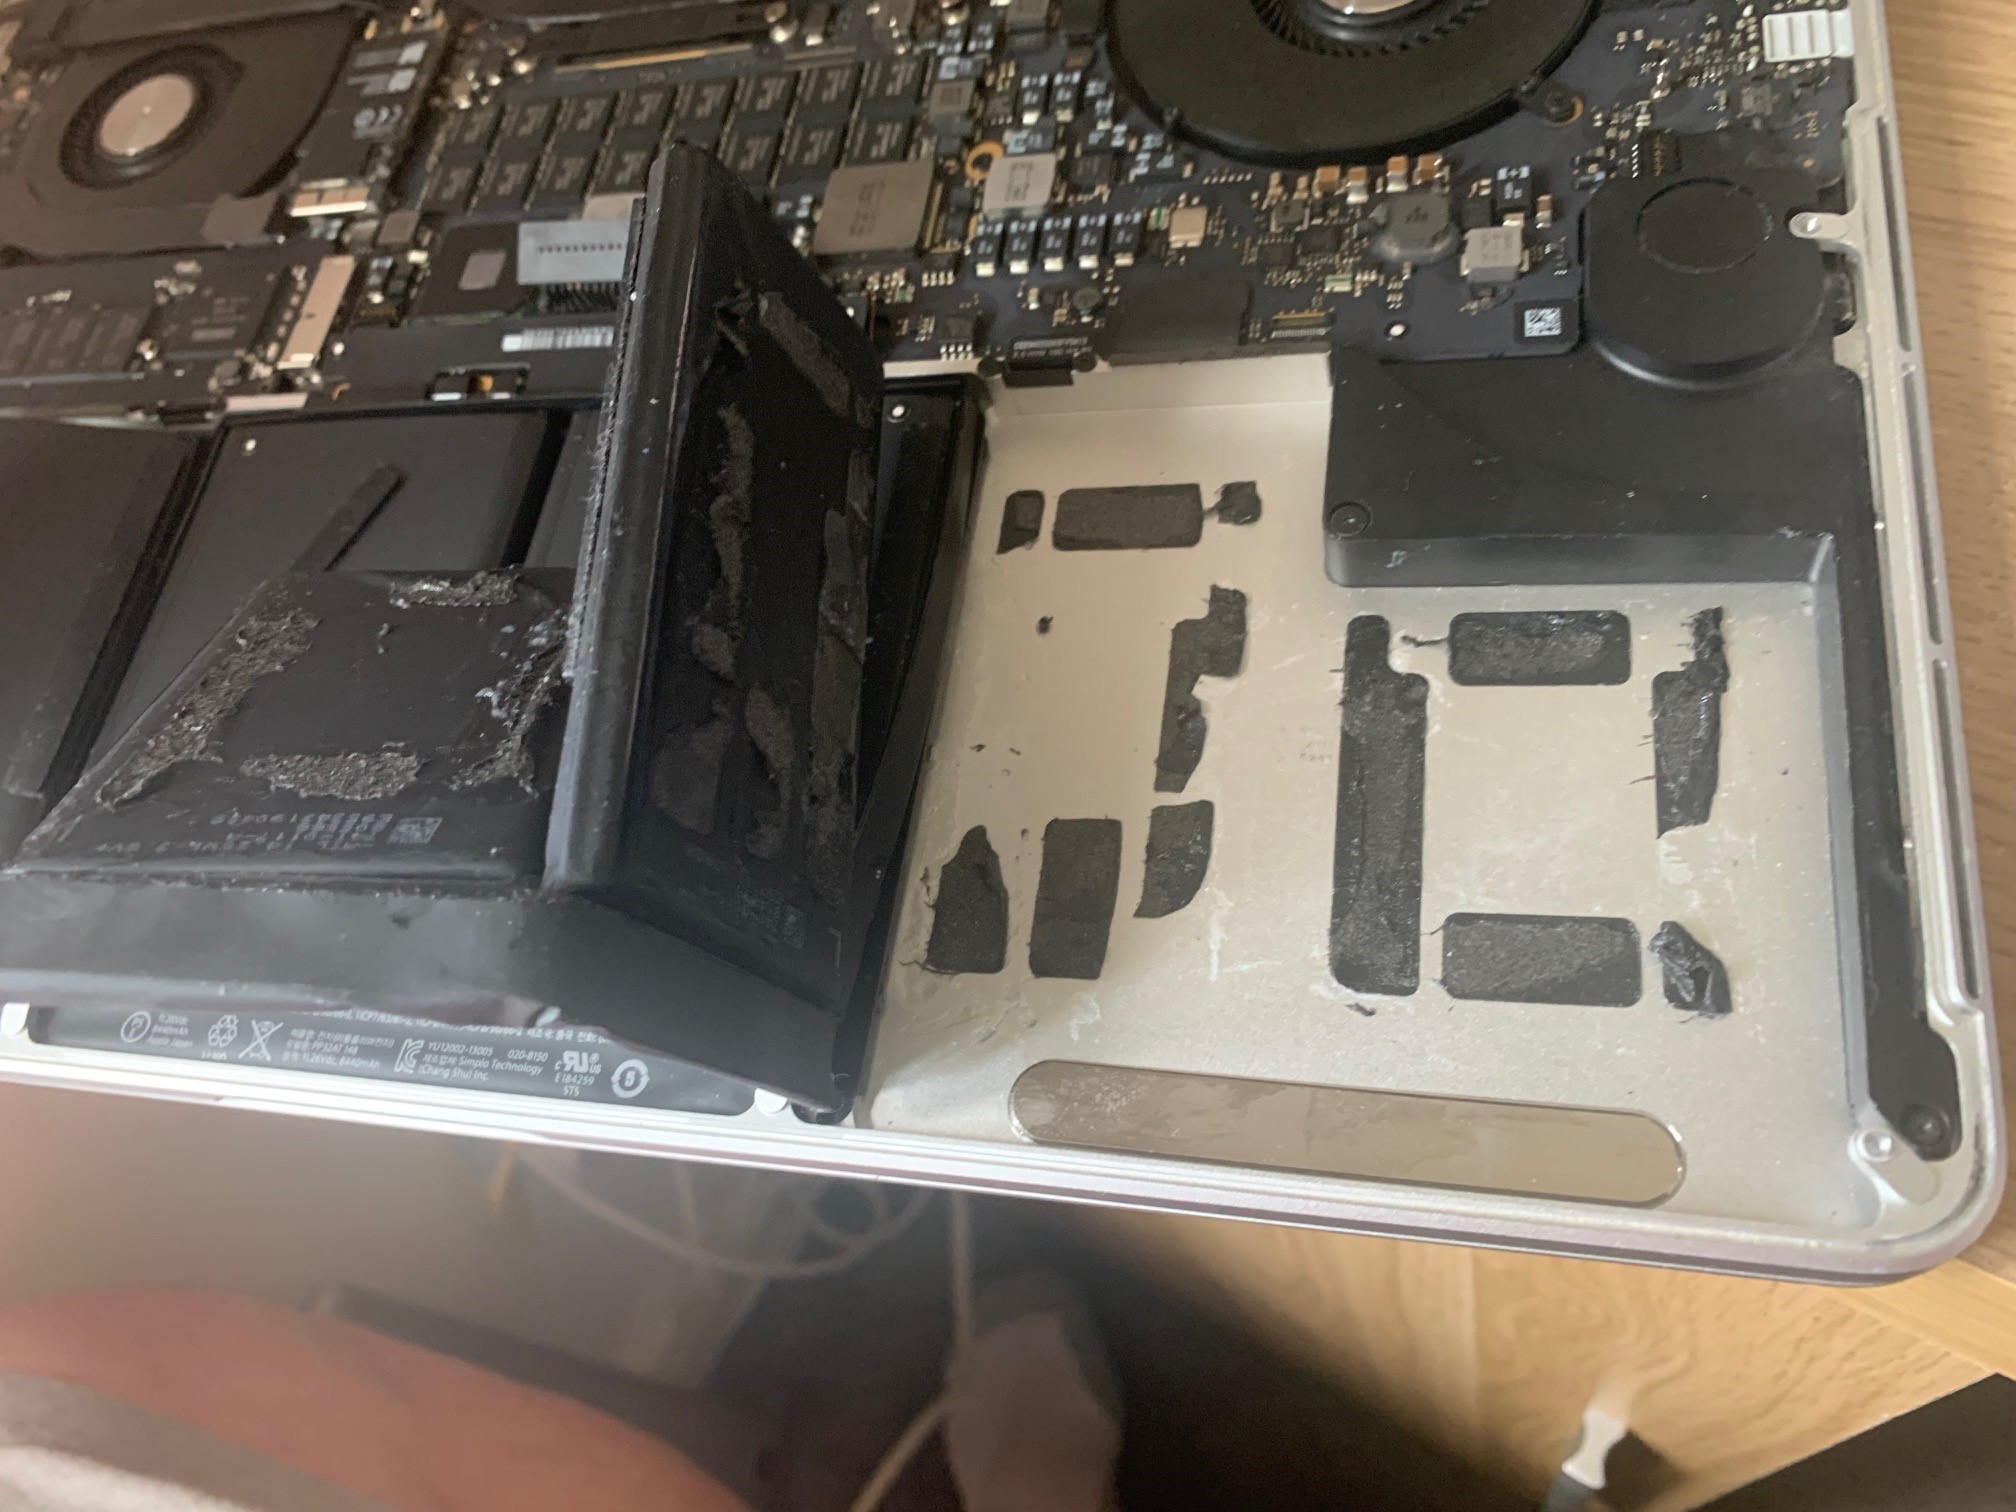
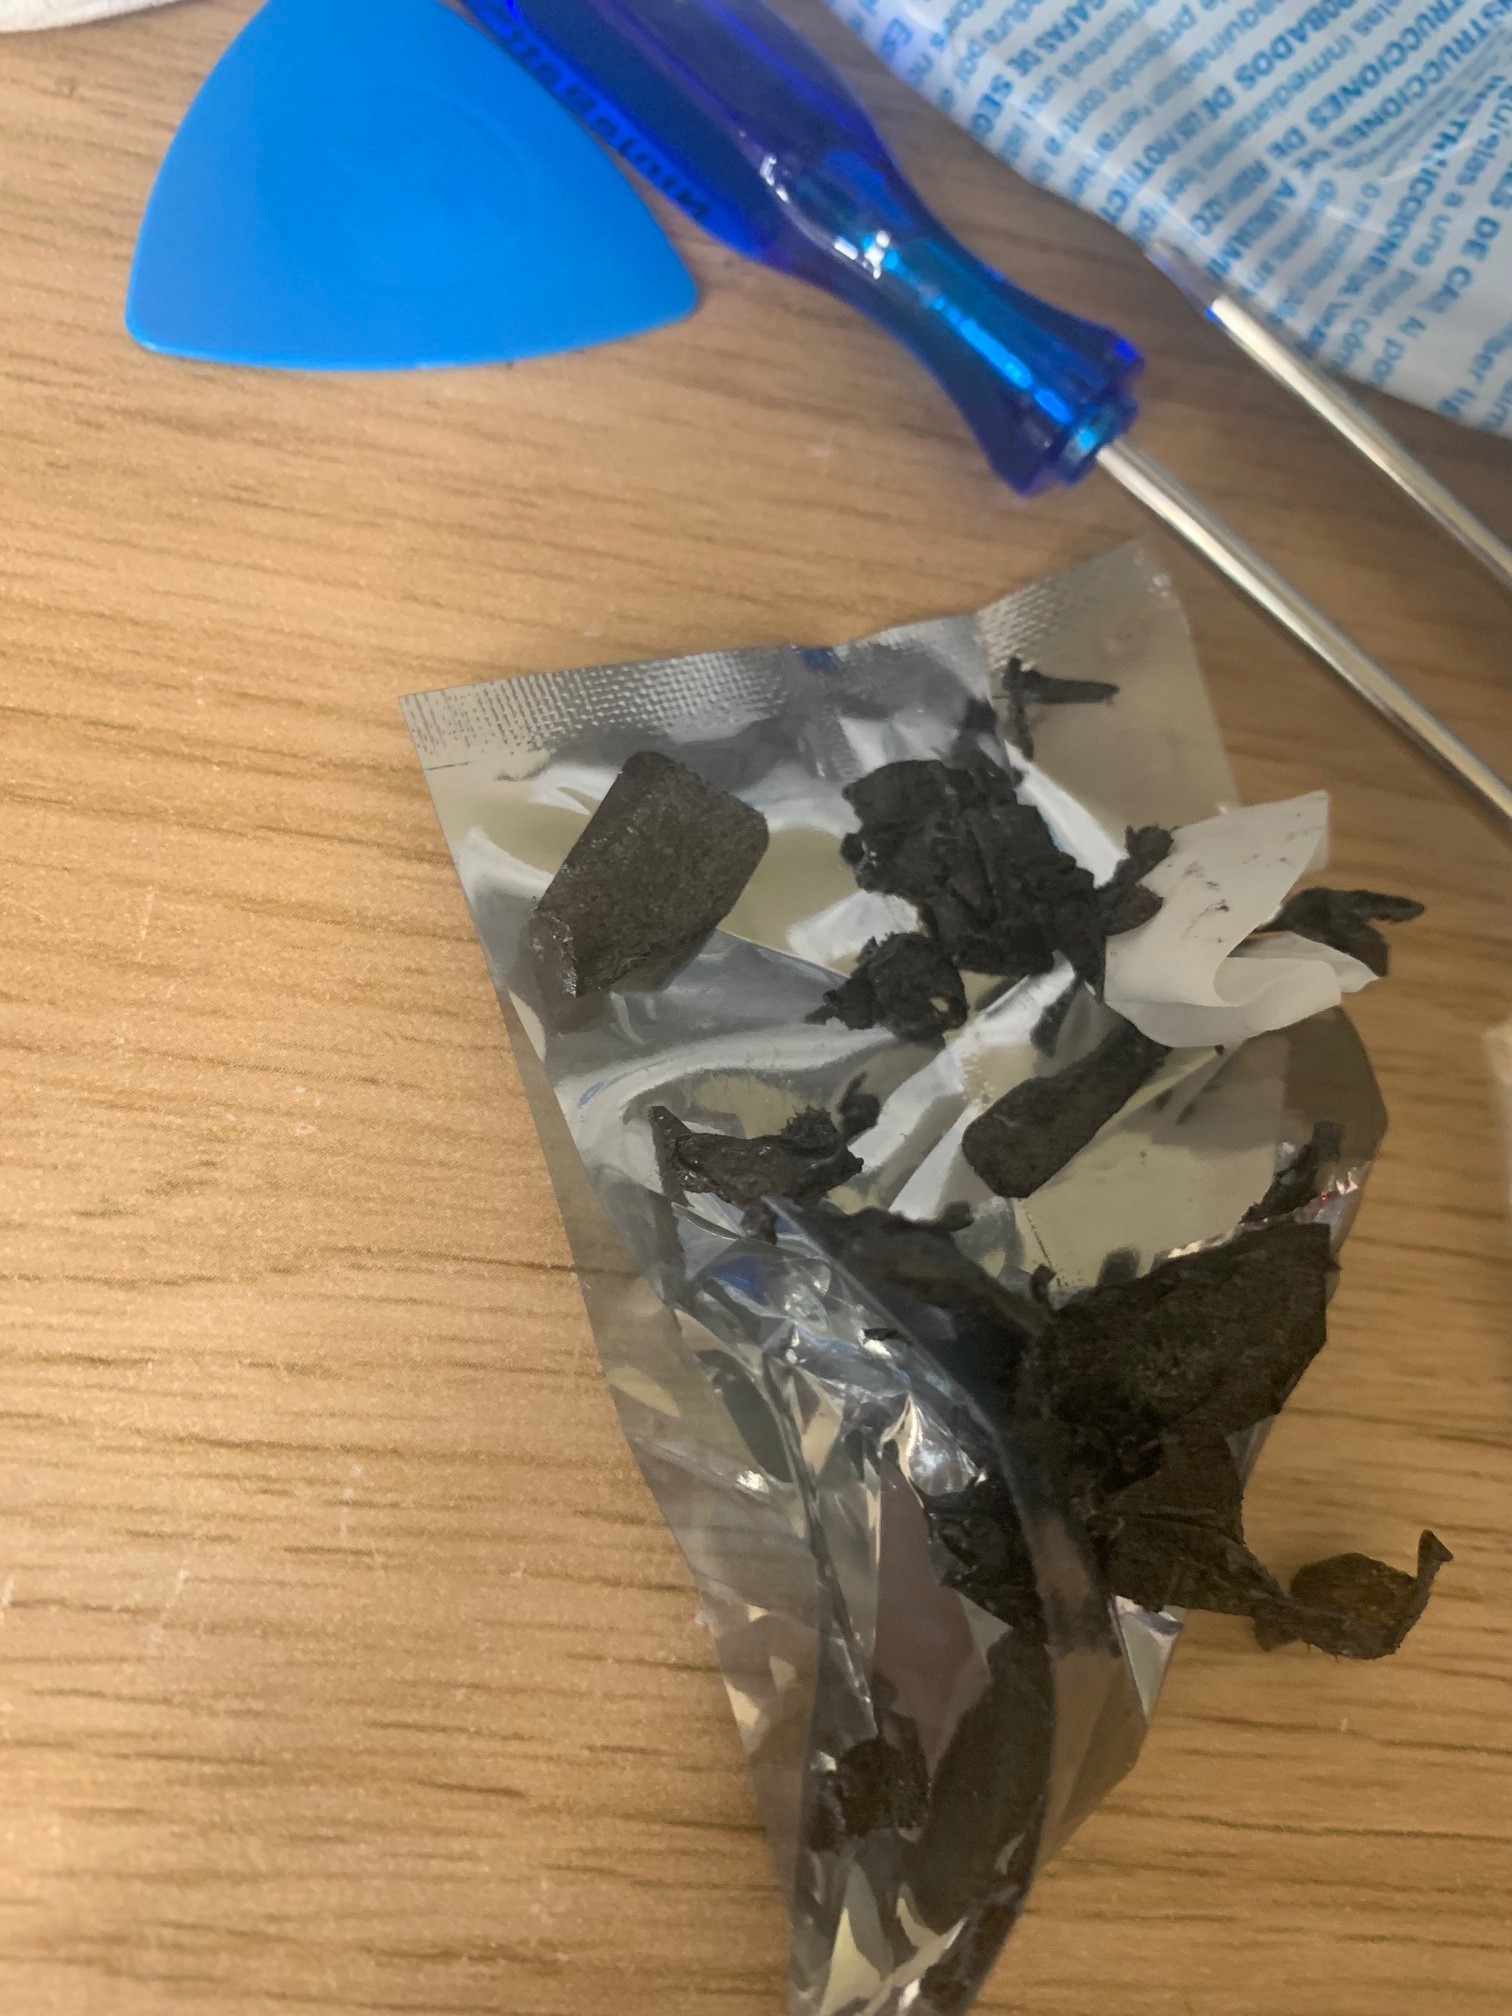
After its removed, you’re left with this, a big sticky mess. Whilst it isn’t necessary, its best practice to remove all of this gunk to make sure that the new battery is properly fitted. Because hopefully (and we’ll get to that in a bit) when you put the battery in, it’ll be in there for a fair few years and you’ll have to repeat this process (if you can still boot your 15 year old MacBook Pro) sometime in late 2028.
It takes quite a bit of work with the adhesive remover and the tools to pry up the edges of the stickers and then get the residue off.
The stuff that comes off them is a pain, it sticks to everything. Wear the rubber gloves provided.
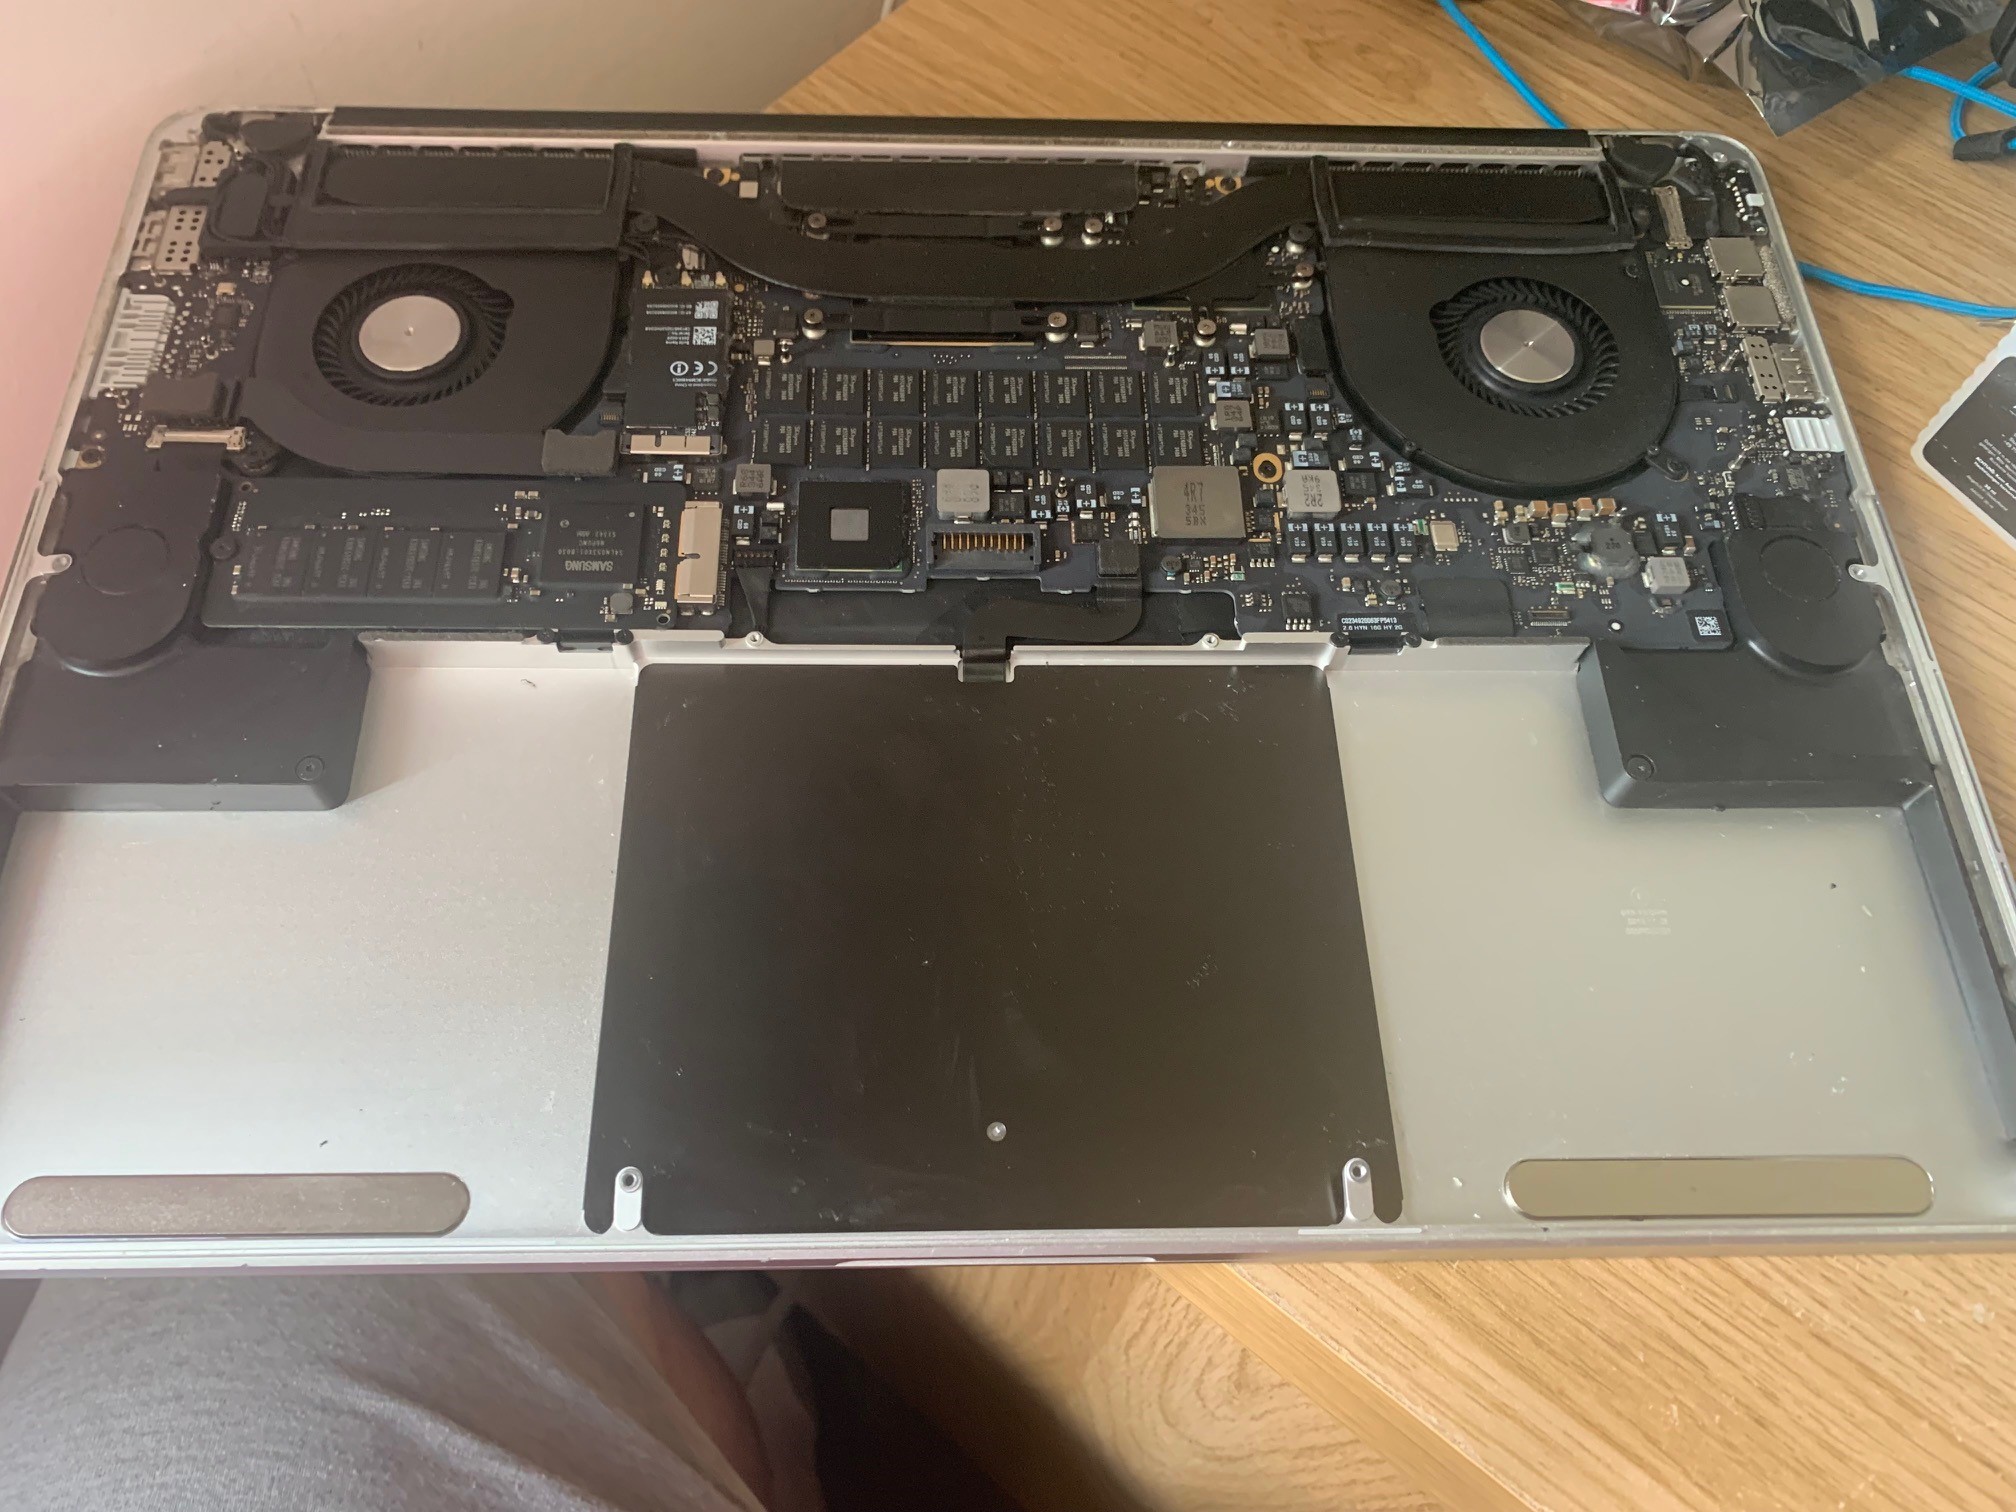
After a bit of work, you’re presented with a lovely clean MacBook Pro shell, ready to receive your brand new battery.
New battery lined up, adhesive protector removed and pressed down.
Case reassembled, power adapter plugged in and an orange light to show its charging (that’s a good sign)
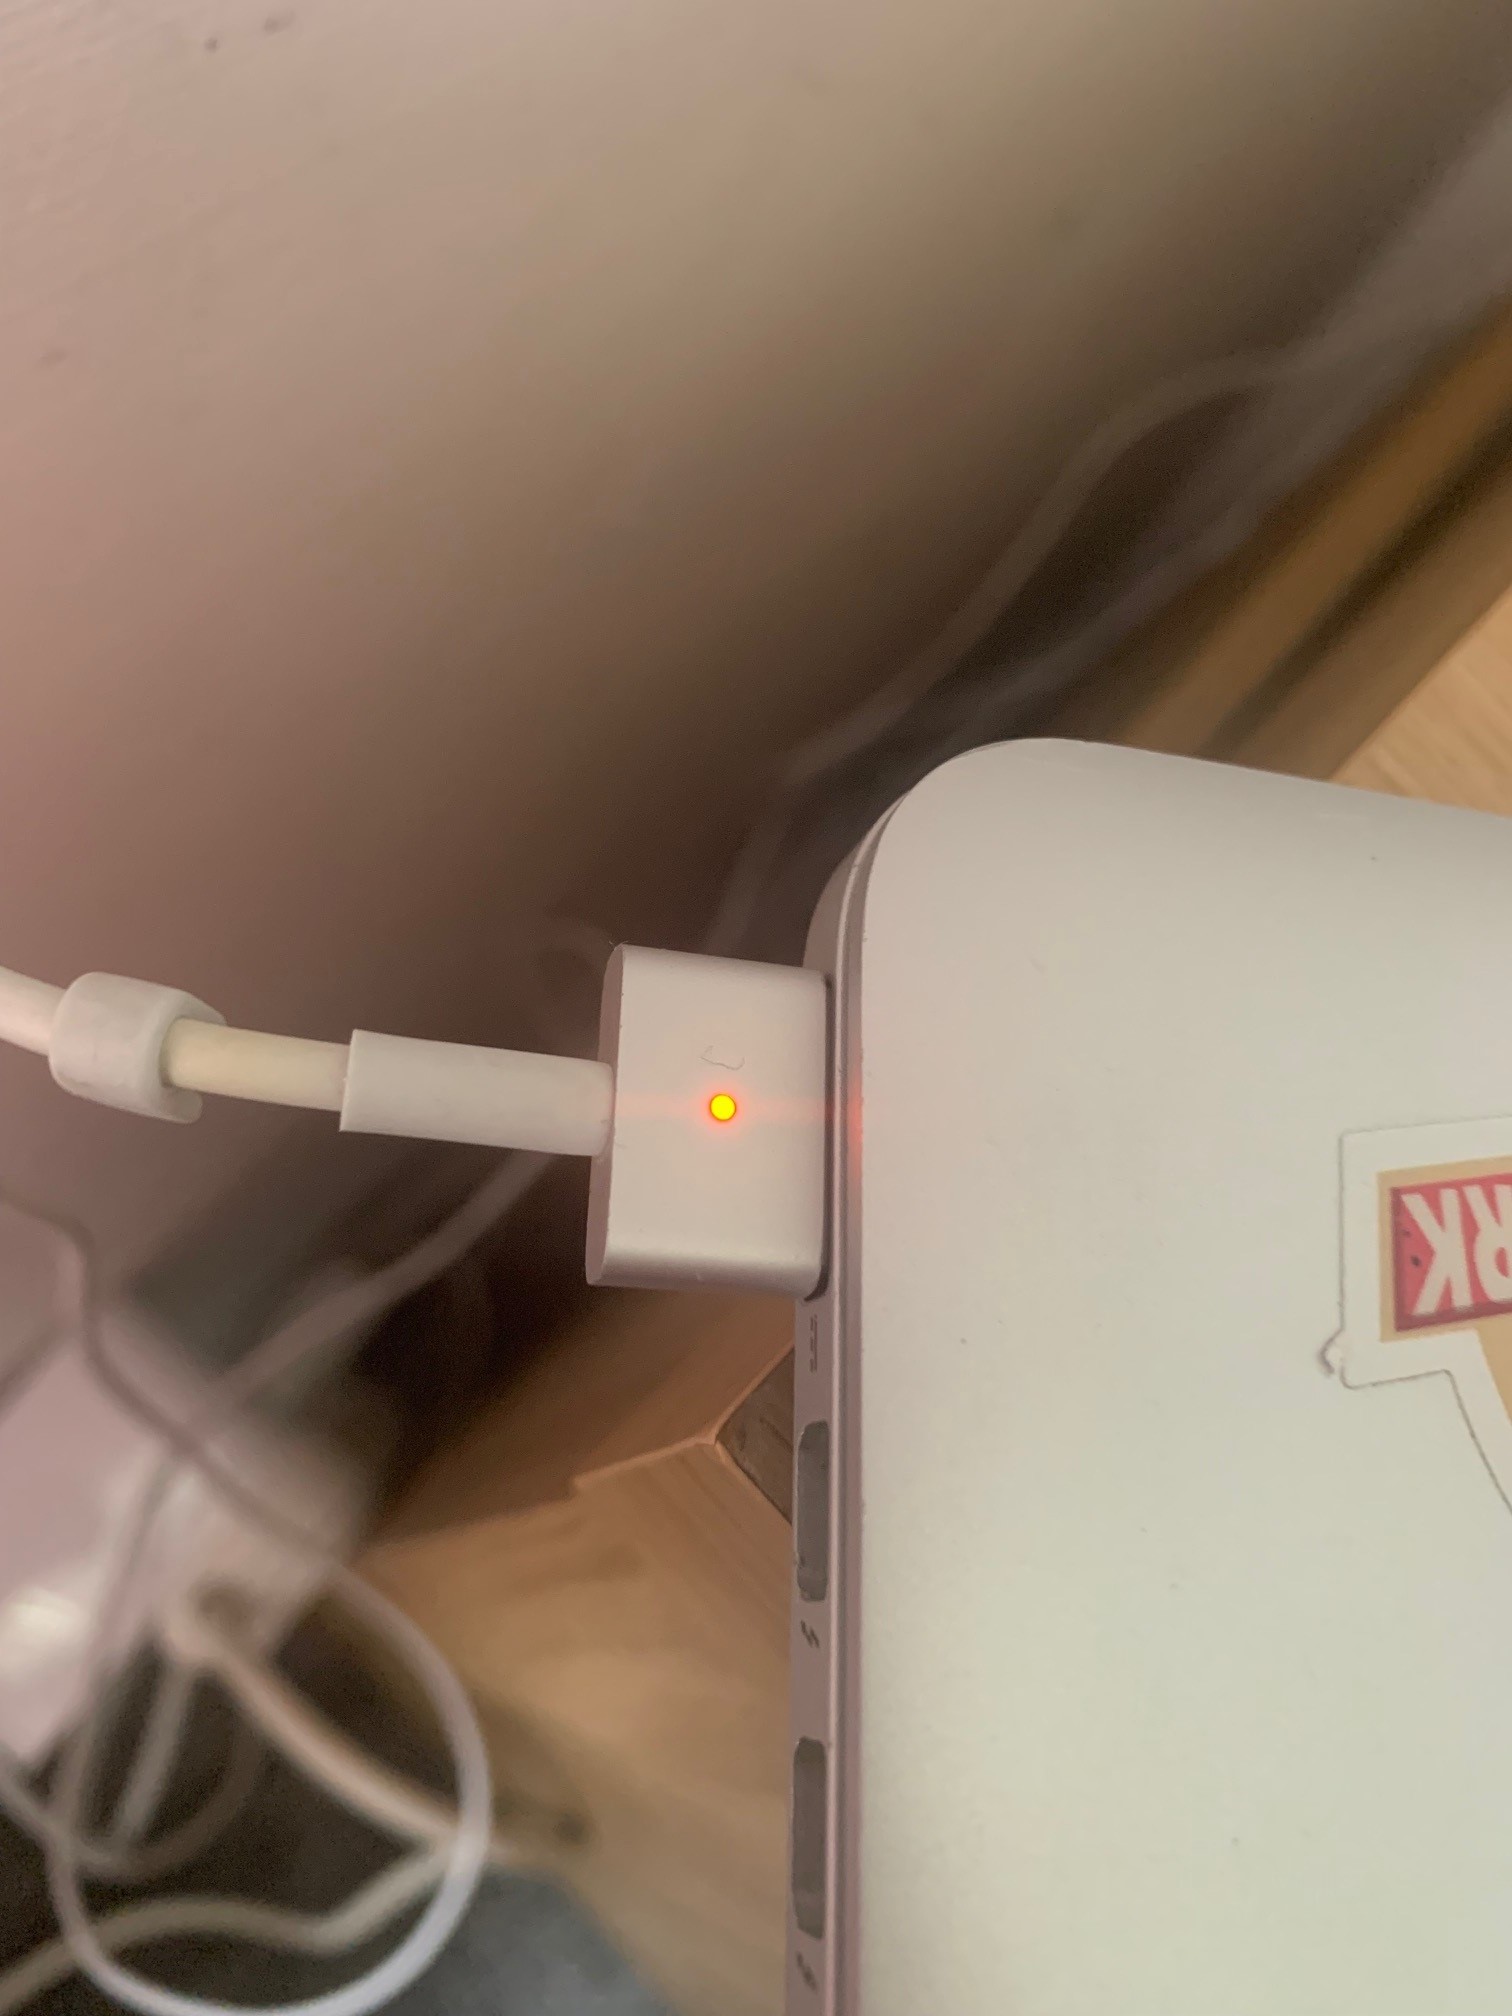
Before you power the Macbook Pro back on, you need to reset the SMC. Usually this is down by holding down the Shift, Control, and Option keys on the left hand side of the keyboard while simultaneously holding the power button. After 10 seconds, let go and you should see your charging cable change colour and then back again.
It also doesn’t hurt to reset your PRAM.
Turn on your computer and immediately press Option, Command, P and R. You’ll hear the startup chime. Keep holding until you hear the startup chime for the second time.
Make sure that you dispose of your old battery in line with the laws/requirements of the place that you live. These are dangerous and should not be put into the general waste.
Once you’re booted into OSX, download and have a look at Coconut Battery to see what’s going on.
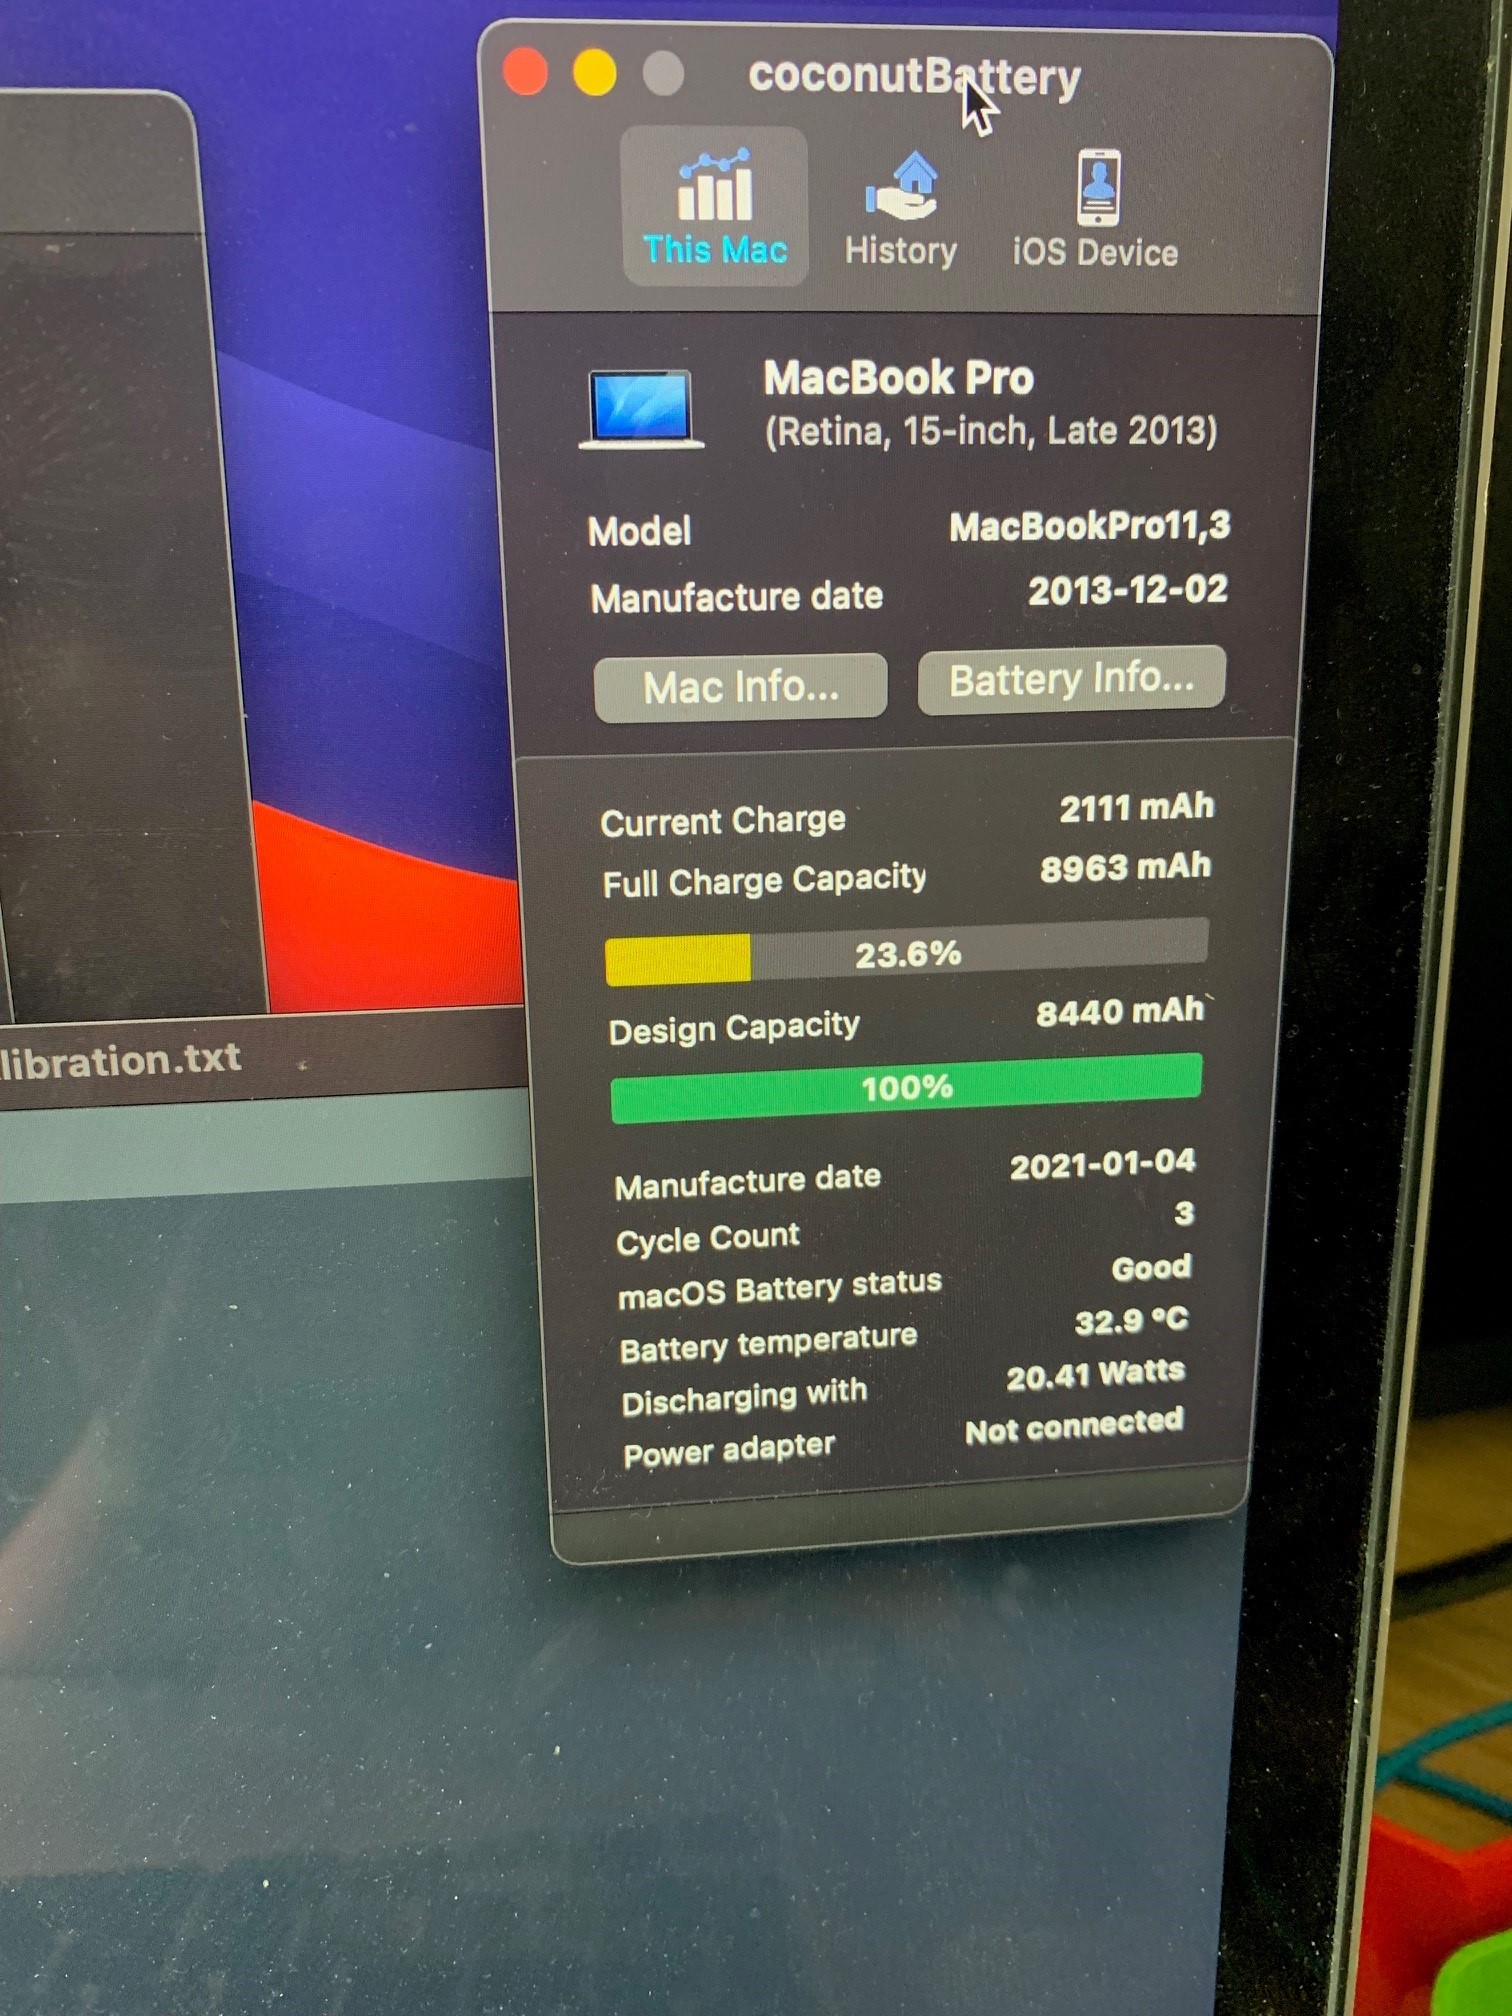
There are a few guides for calibrating your battery - this is the one that I used. It’s important that you calibrate the battery properly.
All in all, not the hardest hardware swap out that I’ve done, and I’d be more than willing to do it again to save £150.
That said, I had some issues post installation.
Whilst conditioning the battery, the charge seemed to be dropping down as expected. Then all of a sudden the battery warning/This Mac will go to sleep soon warning flashed up. The battery charge level had been around 68%, now it was reporting as 7%. I didn’t manage to get a screenshot of it happening. I had a search around and found many, many instances of this happening and not necessarily with NinjaBatt batteries. It seemed to happen with IFixIt batteries and others too. Either bad cells or something has happened somewhere in transit I guess.
The explanation seemed to be a dead/defective cell and the only real option was a replacement. I reached out to NinjaBatt who asked me to reset the SMC, check for OS updates and then asked me to come back to them. I tried that (again) and went back to them and told them that the discharging was still happening but it had gotten more out of it the second time but they told me to return via Amazon.
I raised a request via Amazon but noted that I had to self-return rather than have them pick it up with Hermes, which is unusual. When I went to print off the postage labels, there was a warning that stated if the battery I was returning was defective or damaged, I needed to contact Amazon Support. So I opened up a chat, explained and they said they would refund to my original payment method and I could just dispose of the battery.
I was going to order another one from Amazon but I had a look on eBay and found some genuine Apple replacement batteries, brand new and cheaper than the NinjaBatt one. I decided to give it a go and ordered one.
During the week, I’ve been discharging and recharging the NinjaBatt battery, each day, its gotten slightly better at ‘holding charge’ before dropping to 7% - yesterday it got to 23% before dropping, but then I still got another 45 minutes out of the battery before it shut itself down. So something wasn’t right, and whilst the laptop isn’t worth ’that much’ now, I still paid close to £3,000 for it in late 2013 so I’ll want to hang on to it for a while longer yet.
The new battery arrived today and I put it in during my lunch break.
Removing the NinaBatt battery was easier than removing the Apple one. I’m not sure if its because it had only been in there 5 days or whether or not the adhesive wasn’t as good, but I didn’t need to use adhesive remover to get the Ifixit tools under the cells and got them all out without too much bother - still left some stickers on the shell though which was a pain.
I reset the SMC and the PRAM and the battery has charged. It’s just flashed to tell me that it’s fully charged so it looks like I can leave it plugged in for two more hours before I start to drain it. With any luck I’ll get to drain it properly this evening and leave it overnight to fully discharge, then plug it in tomorrow and we should be conditioned.
I’d definitely do this again if I had to (and I guess I have had to) rather than pay £200 for Apple to do it, especially on a machine that generally looks to be going for less than £400 on eBay (but they might not have 1TB SSDs), you’re talking about spending half the value to get it working properly without a power lead again.
It was rated as advanced/expert repair level on some guide sites I’ve seen, I’d rate it probably medium, depending on your experience and skills.
comments powered by Disqus